Welcome to the first Christmas “moment” of the year! I’m channeling ‘simple and elegant’ throughout our home this Christmas and the mantel is no exception! I’m keeping it simple by repeating a similar look to last year’s Christmas Mantel and elegant with gorgeous black satin ribbon bows, fresh garland and twinkle lights. Today, I’m sharing How to Decorate a Simple & Elegant Christmas Mantel as part of the Season Simplicity series – Christmas Edition.
Thanks to Krista of the Happy Housie for hosting such a wonderfully inspiring series each season! If you’re coming over from My 100 Year Old Home, then welcome! I know so many are gearing up for Thanksgiving this week and then right on to Christmas shopping and decorating over the weekend. So I thought it would be helpful to share a few tips that helped me decorate our mantel for Christmas this year.
I broke down my mantel decorating process into 6 simple steps in hopes to help make this portion of your decorating experience a little easier. We can all use a little help when it comes to dragging out the dreaded Christmas bins. Or is it just me?!
Once I get started, I am absolutely in my happy place, but it’s the getting started part that is so hard sometimes! I decided to do some planning beforehand in order to make the process go a little smoother.
Here is what I did!
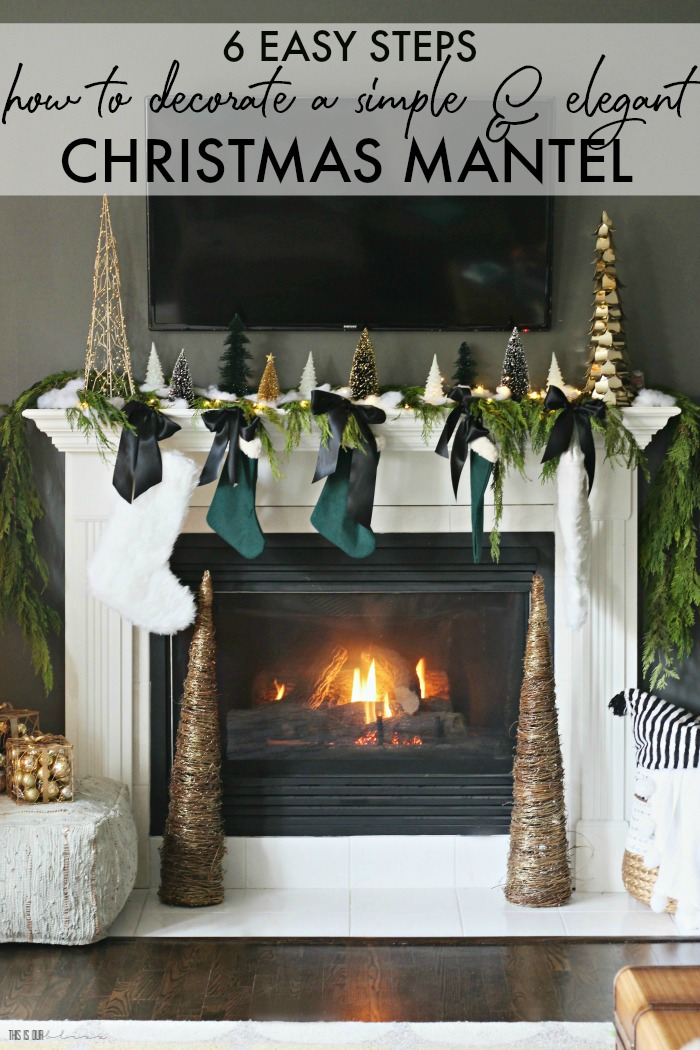
HOW TO DECORATE A SIMPLE & ELEGANT CHRISTMAS MANTEL
1 | GATHER DECOR ITEMS.
But first! ASSESS YOUR DECOR, PURGE & PURCHASE ANY NEW ITEMS YOU WANT TO USE.
I was finding myself breezing right past certain items in the Christmas bins and never actually pulling them out to use. And then when Christmas is over and it’s time to pack up, I want those bins filled, closed up and out! It’s like Christmas decor can’t get put away fast enough. So after purging a ton of my decor, I knew I needed 2 new items that would give me the look and feel I was aiming for – again, Simple & Elegant.
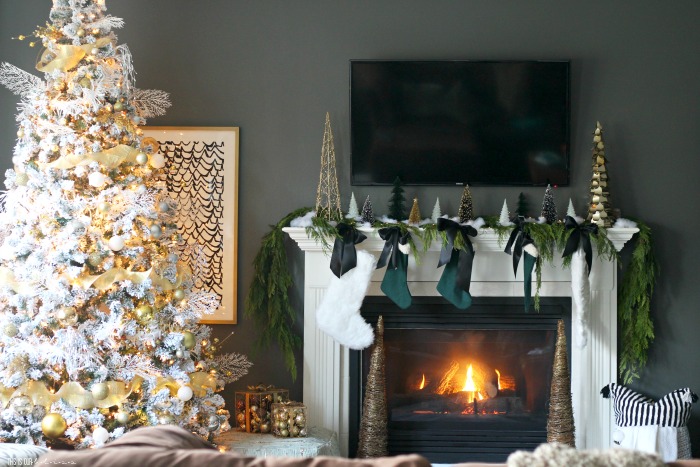
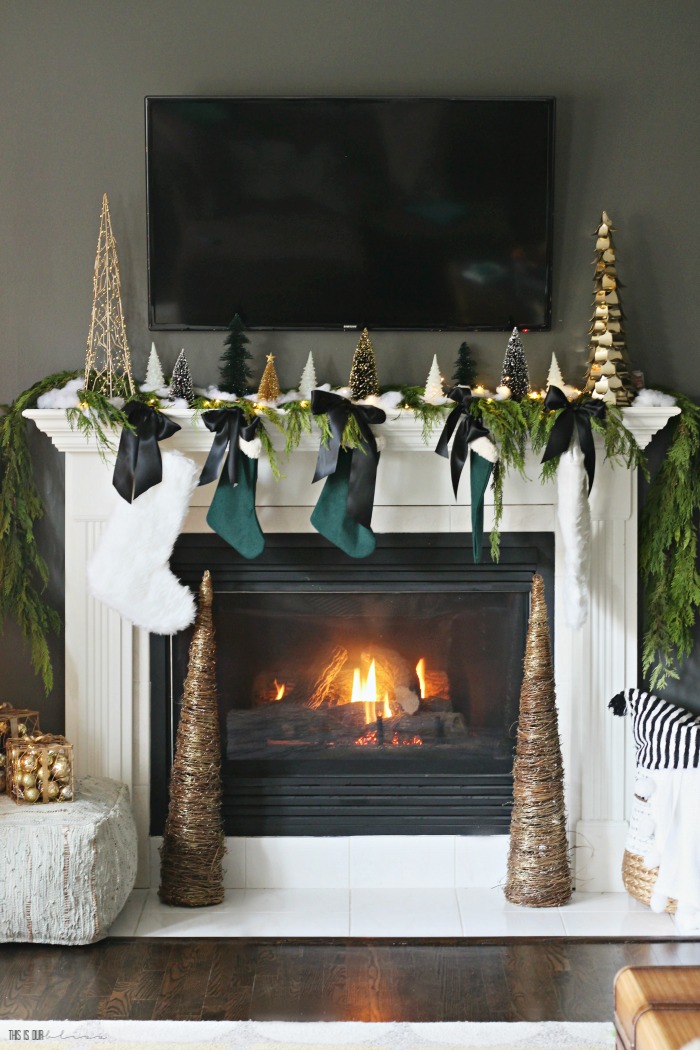
I bought black satin ribbon and picked up fresh cedar garland from Trader Joe’s. I was going to use our same stockings from last year, my collection of mini trees [with the addition of 2 black & green bottle brush trees from the Target $1] snow fluff and my favorite twinkle lights.
That’s it!
2 | CLEAR YOUR MANTEL COMPLETELY.
It can be hard to get a vision for how you want things to look if you’re staring at pumpkins and dead Eucalyptus. ha! While it all looked great in our Fall Mantel set-up, it was time to bring it down and start decorating for Christmas with a clean slate.
3 | PREPARE THE STOCKINGS TO BE HUNG.
First, I cut 5 pieces of black satin ribbon [each about 36″ long] and threaded it through each stocking. I looped the ribbon on the mini clear command hooks at the back of the mantel [we keep them there all year-round] making sure that the ends of the ribbon were even. Then I tied a knot near the loop of the stocking and continued tying the ribbon into a bow. The bow should sit near the front edge of the mantel keeping the top of the stocking in position.
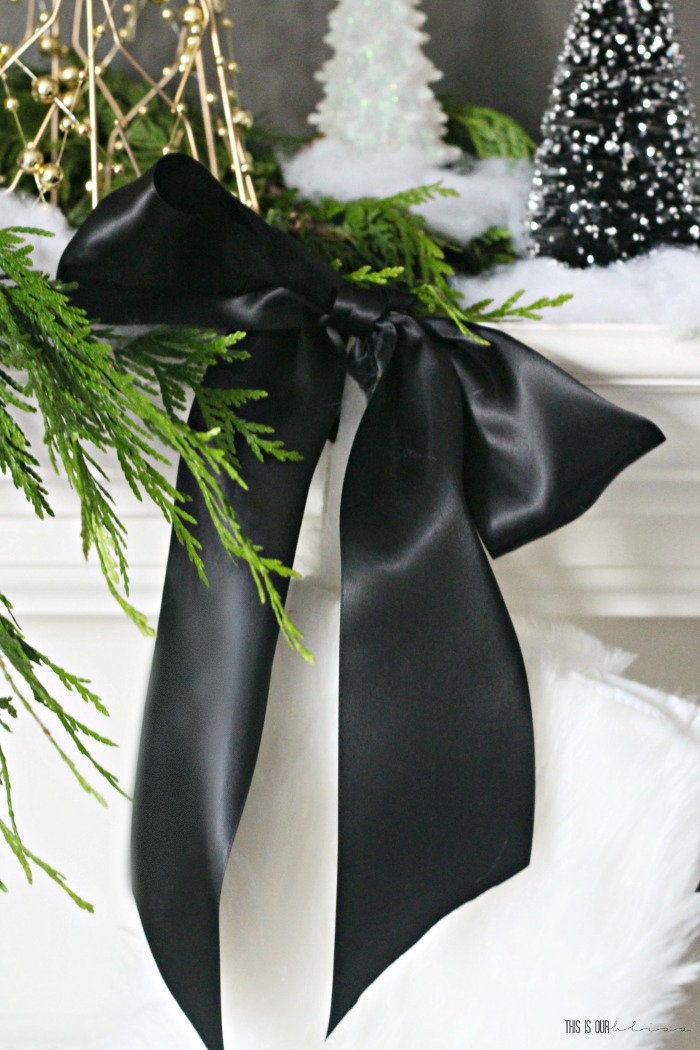
I hope this makes sense. You might have to do some tweaking with your positioning of the bow, but that’s the nice part about satin ribbon – it knots and un-knots really easily!
4 | LAY THE FRESH GARLAND ACROSS THE MANTEL.
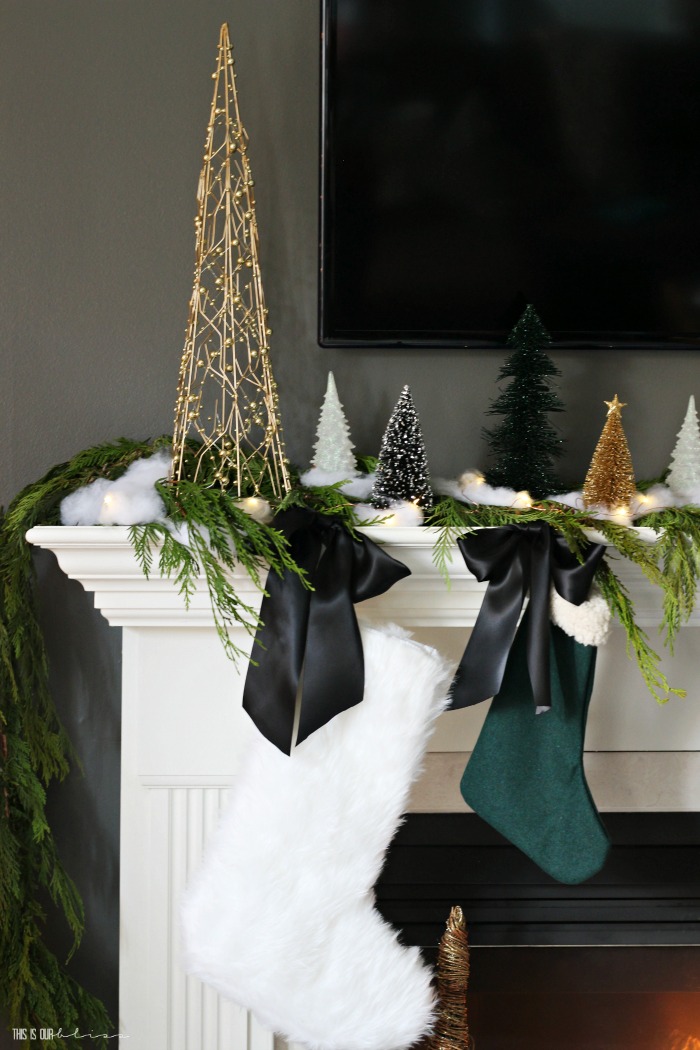
I like to have a nice, long amount of swag on either side of the mantel and it doesn’t have to be perfectly even or symmetrical. In fact, I like when it is a little more free-falling and organic looking than too perfect. Once it’s sitting where I want it, then I snip a few feet off of a second strand of garland [I tend to buy a few extra to use in different places] and stick it on the left side of the mantel so it hangs down in the opposite direction of the main garland.
5 | PLACE A VARIETY OF TREES OUT.
I have a small collection of mini trees from over the years and I like to display most of them right here together. Space them 4-5 inches apart and nestle them down in the garland. Set some to the front and then alternate by placing some towards the back of the mantel. This creates depth and dimension.

And allows for easier placement of the snow and lights in the next step!
6 | SPREAD OUT SNOW FLUFF AND ADD IN TWINKLE LIGHTS.
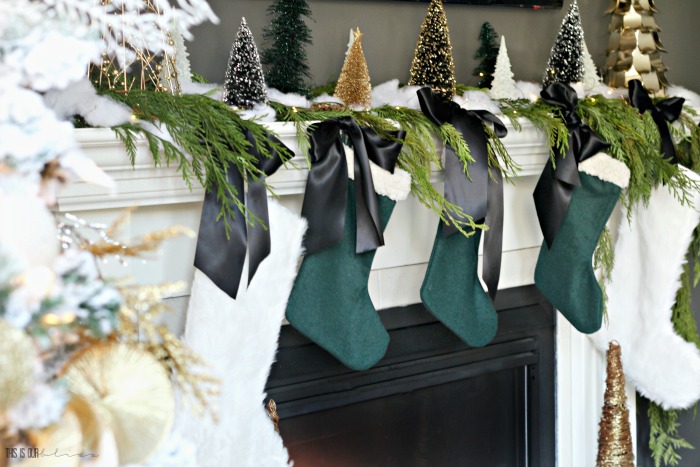
It’s here in this last step that you have to do some tweaking to get it just how you want it. Once my trees were in place, I grabbed a few small pieces of snow fluff and sort of tucked it around the front of the trees and off to each of the sides. I also picked up pieces of the garland and tucked some snow underneath it. Be careful not to use too much snow fluff, as you really want the fresh garland to be the star. The snow is only a subtle accent.
Remember, we’re going for simple 😉
After that, place your twinkle light battery pack on one end [mine is behind the big gold tree on the right] and then start winding the wire around the trees until you get to the other end. You could argue that it might be easier to put the lights down first and then add the snow. But I just tucked the copper wire under pieces of snow and garland when I could and then not really care if you can see the wire up close.
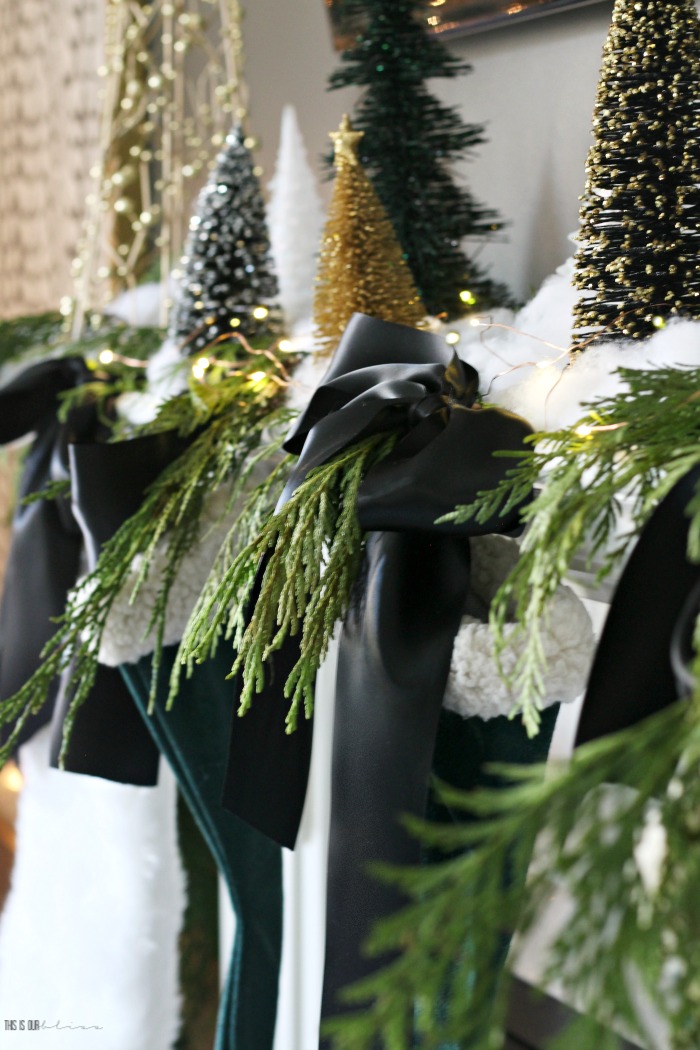
Everyone will be admiring it from the couch anyways! At least that’s my favorite spot to enjoy the view from 😉
Was this helpful?! I am really digging the look of the black satin ribbon and am using it throughout the house for the holidays. It’s classic and elegant and looks gorgeous no matter where you put it. I can’t wait to show you everything I’ve decorated!
Next week you’ll be seeing more of our Simple & Elegant Christmas Home, so be sure to stop back over. The holiday season is in full swing!!
For more Christmas inspiration, you can check out this Christmas Snack mix recipe, get these Free Christmas Gift tags, get some holiday style inspiration and also see last year’s Christmas Home Tour Recap here!
Now, be sure to head down to see my friends’ beautifully decorated mantels and vignettes.
There is so much Christmas eye candy below!

Welcome to the fourth week of the Seasonal Simplicity Christmas Series! Today a group of my blogging friends and I are sharing our Holiday Mantels and a few vignette decorating ideas, to help inspire you for the upcoming holidays. Click on the links below each image to be taken directly to the different posts.

The Happy Housie // Cherished Bliss // The Handmade Home
Modern Glam // Craftberry Bush

House by Hoff // Rambling Renovators // Rooms FOR Rent
Jenna Kate at Home // Just a Girl and Her Blog

The Turquoise Home // Sincerely, Marie Designs // Grace In My Space
My Uncommon Slice of Suburbia // Zevy Joy

Lolly Jane // Tatertots and Jello // She Gave it a Go
Jamie Costiglio //Southern State of Mind

Place of My Taste // Summer Adams Designs // Life is a Party
We Are The Joneses // Kim Power Style

The DIY Mommy // Two Twenty One // My 100 Year Old Home
This is Our Bliss // Taryn Whiteaker Designs

Amber Tysl // Styled With Lace // Happy Happy Nester
Clean and Scentsible // My Sweet Savannah // So Much Better With Age
Don’t forget to pin for later!

See you back here tomorrow for my Holiday Amazon Finds! There are some goodies 🙂









How to Decorate a Simple and Elegant Christmas Mantel ... - DIY Awesomeness
December 9, 2019 at 8:47 AM[…] {$excerpt:n} Source: How to Decorate a Simple and Elegant Christmas Mantel … […]
Simple and Elegant Christmas Living Room | This is our Bliss
December 6, 2019 at 11:01 AM[…] the horn and ring the bells! Today is my first Christmas Home Tour of the year! You saw my Christmas Mantel last week, but I’m shifting spaces and giving you a peek inside our Living Room and staircase […]
Krista
November 27, 2019 at 12:51 PMYou definitely nailed elegant and simple! I love the black ribbon and those tall trees on the side of the fireplace. I can’t wait to see more.
The Best Holiday Amazon Finds Under $40 | This is our Bliss
November 27, 2019 at 7:57 AM[…] and timer! I used the same black satin ribbon to hang this garland as I used on our stockings on this year’s Simple and Elegant Christmas Mantel. I love look of fresh garland like I used above the fireplace, but these I can store away and not […]
Asymmetrical Holiday Mantel Decor - PLACE OF MY TASTE
November 26, 2019 at 7:42 AM[…] DIY Mommy // Two Twenty One // My 100 Year Old Home This is Our Bliss // Taryn Whiteaker […]
Festive Holiday Mantle | 2019 - Rooms For Rent blog
November 26, 2019 at 6:01 AM[…] DIY Mommy // Two Twenty One // My 100 Year Old Home This is Our Bliss // Taryn Whiteaker […]
Simple Christmas Mantel with Fresh Garland - Cherished Bliss
November 26, 2019 at 5:01 AM[…] DIY Mommy // Two Twenty One // My 100 Year Old Home This is Our Bliss // Taryn Whiteaker […]
Holiday Mantel Decorating Ideas & Our Christmas Mantel Decor | The Happy Housie
November 26, 2019 at 4:04 AM[…] DIY Mommy // Two Twenty One // My 100 Year Old Home This is Our Bliss // Taryn Whiteaker […]
Modern Farmhouse Holiday Kitchen Shelves Styling Ideas
November 26, 2019 at 4:02 AM[…] DIY Mommy // Two Twenty One // My 100 Year Old Home This is Our Bliss // Taryn Whiteaker […]
Simple Christmas Mantel - Taryn Whiteaker
November 26, 2019 at 4:02 AM[…] DIY Mommy // Two Twenty One // My 100 Year Old Home This is Our Bliss // Taryn Whiteaker […]
DIY Mantel Decorated for Christmas - Kim Power Style
November 26, 2019 at 4:01 AM[…] DIY Mommy // Two Twenty One // My 100 Year Old Home This is Our Bliss // Taryn Whiteaker […]
Christmas Mudroom Decor | Abby Lawson
November 26, 2019 at 4:01 AM[…] This is Our Bliss // Taryn Whiteaker Designs […]