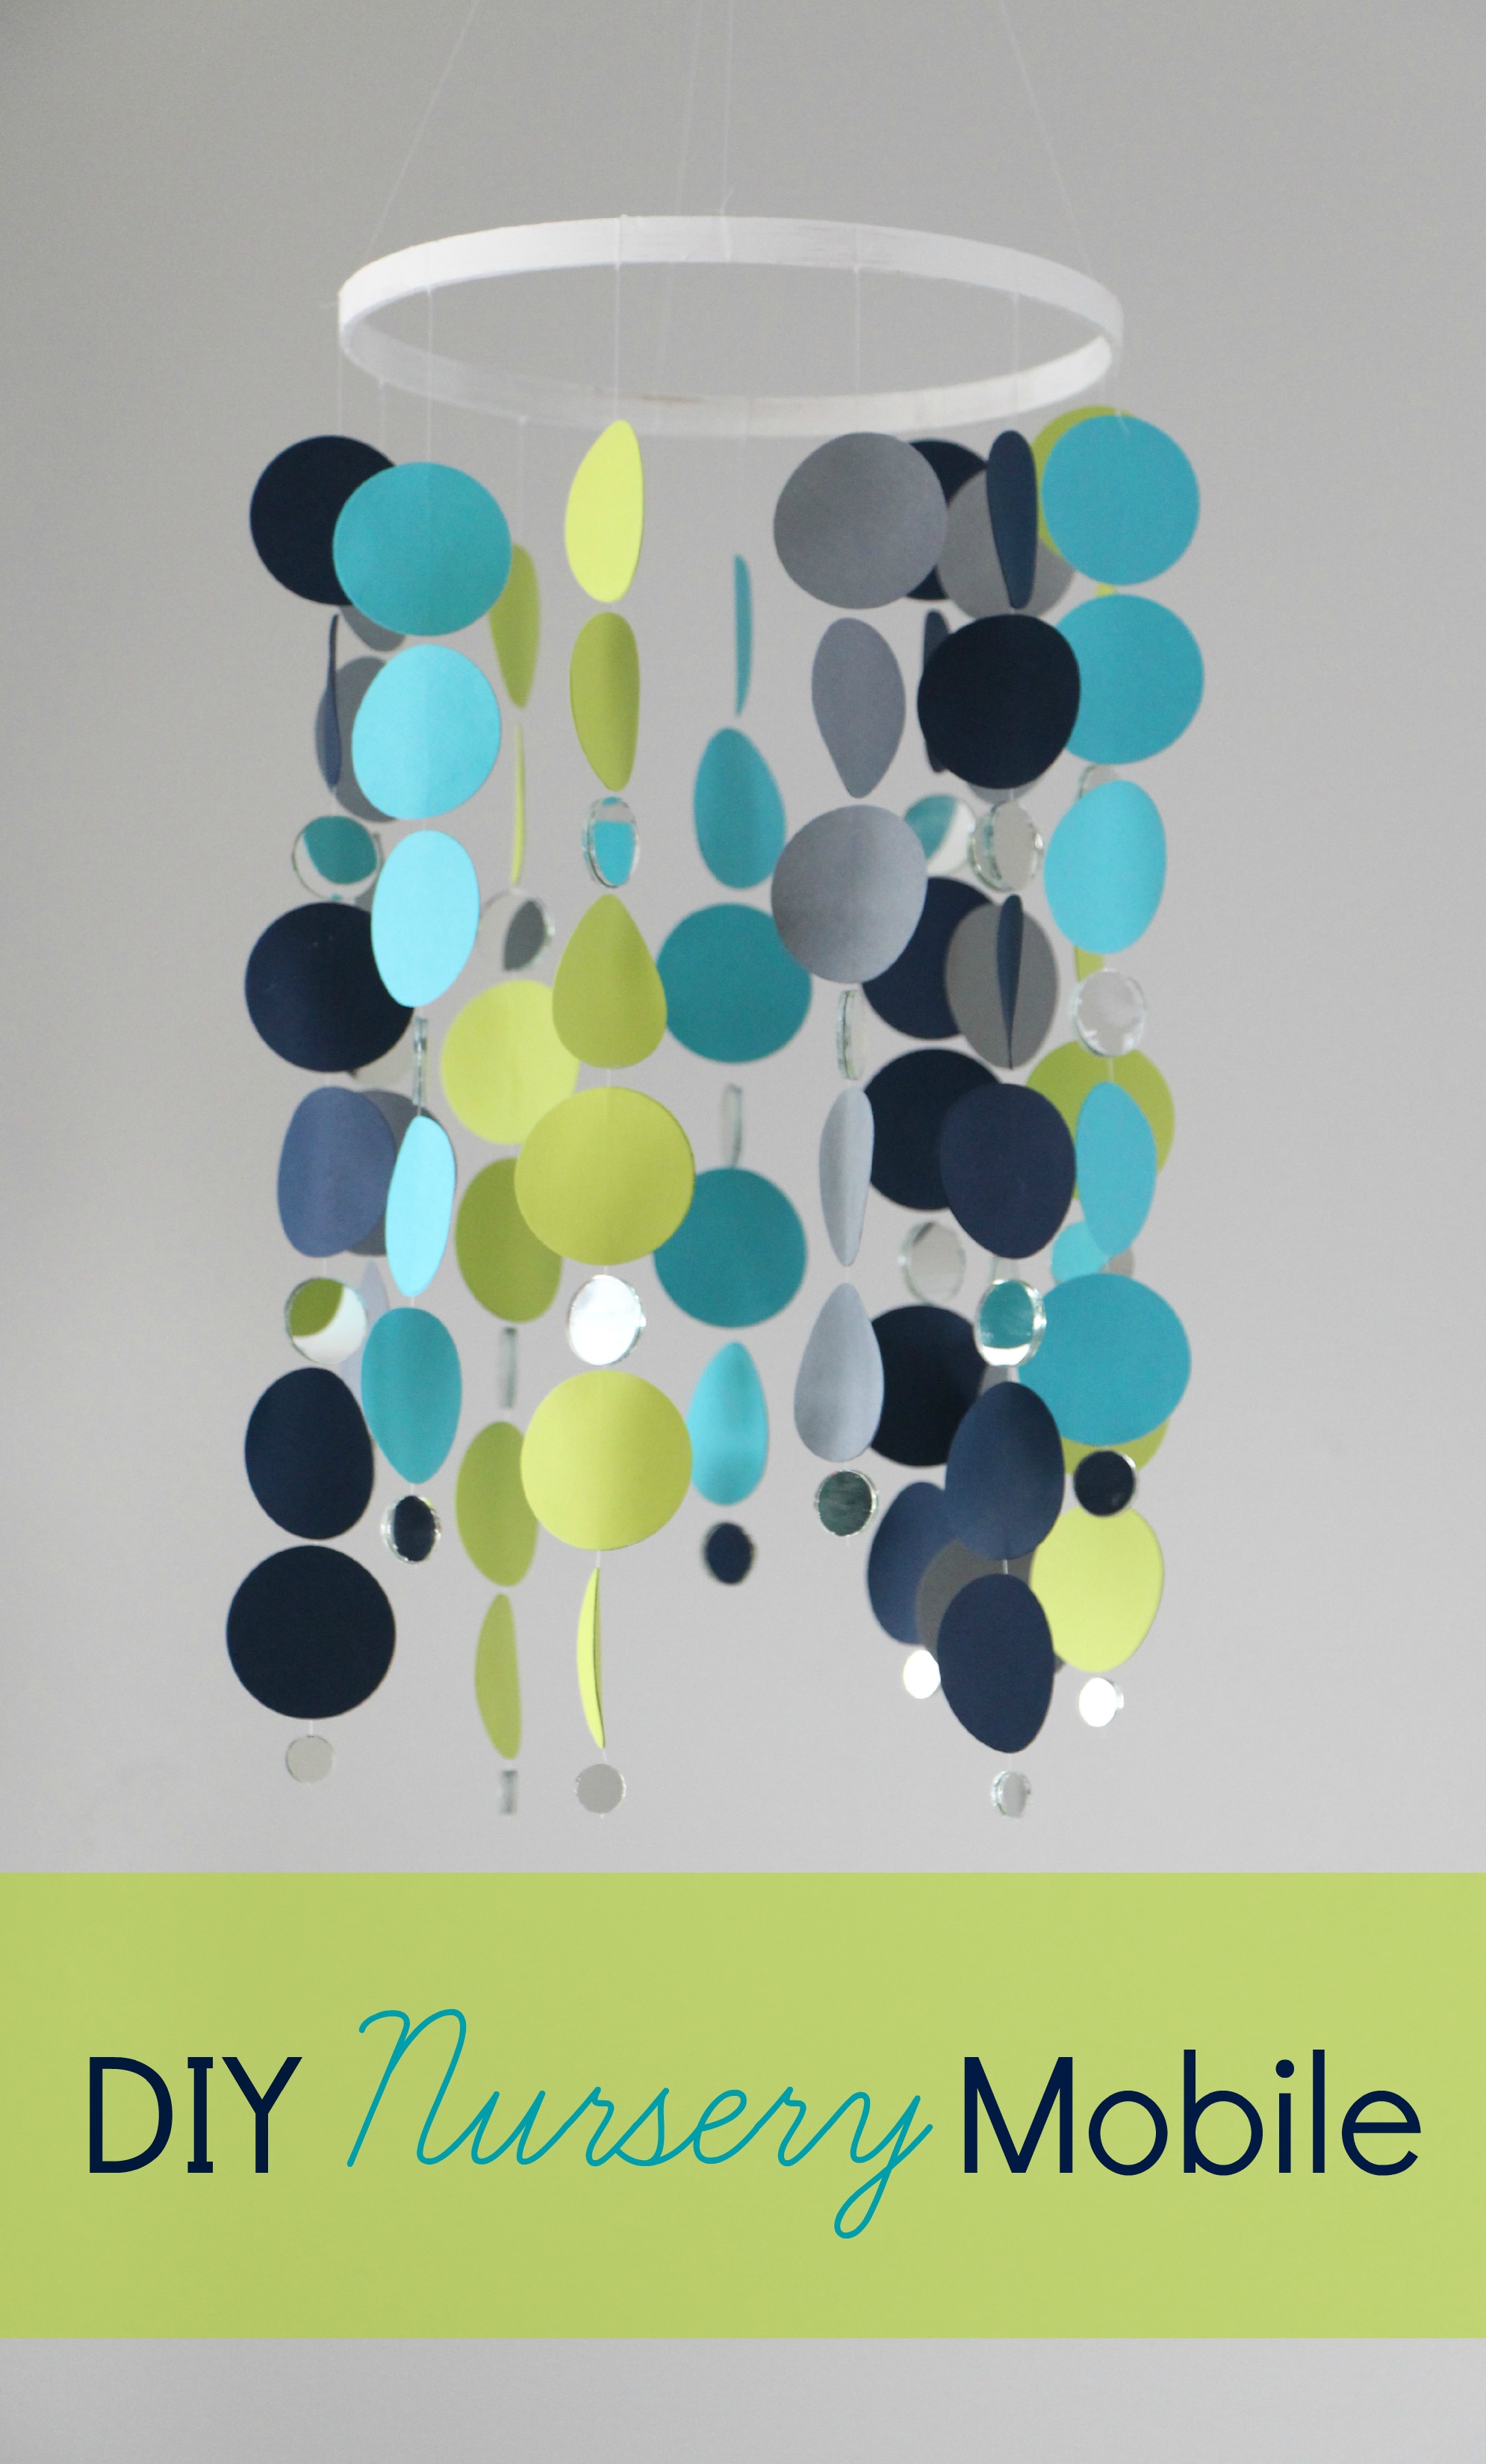
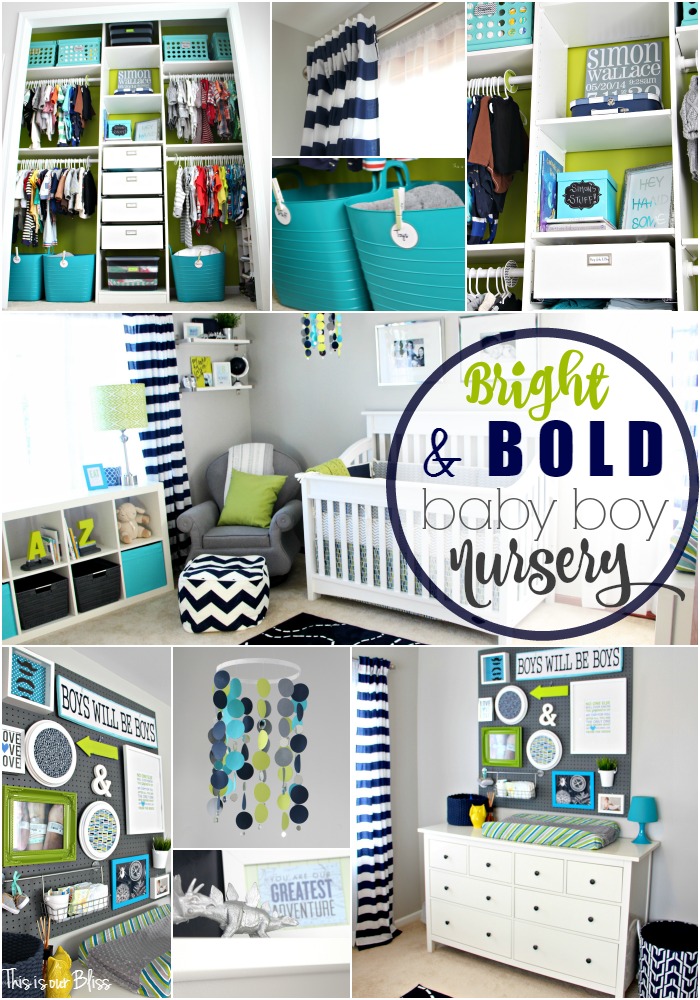
Hello and welcome back for another DIY Nursery Project! I’m thrilled to have you here. This Simple DIY Nursery Mobile is an easy concept and can probably be completed in under an hour! The color and pattern combinations are endless, but since I’m working with lime green, navy blue, gray and aqua in the nursery, those are the colors I stuck with! Here is what I did to create this Quick and Simple DIY Nursery Mobile!
SUPPLIES
- 2 sheets each of gray, navy, lime green & aqua 12″ x 12″ scrapbook paper
- 2″ round paper punch
- clear thread / fishing line
- craft glue
- small round mirror discs (various sizes)
- 9″ embroidery hoop (inside hoop only)
- white craft paint
- ceiling mount hook (outdoor hanging plant hook painted white)
- *** All supplies were purchased at Michaels except the hook which I had
HOW TO MAKE A SIMPLE DIY NURSERY MOBILE
The first step is to paint the embroidery hoop your desired color. I chose white so applied the craft paint with a small foam brush, but you could spray paint the hoop just as easily. Leave it out to dry white you work on the strands which you’ll attach to your painted hoop at the end.

I picked out four colors of cardstock paper at Michaels and began cutting out circles using this 2″ paper punch.


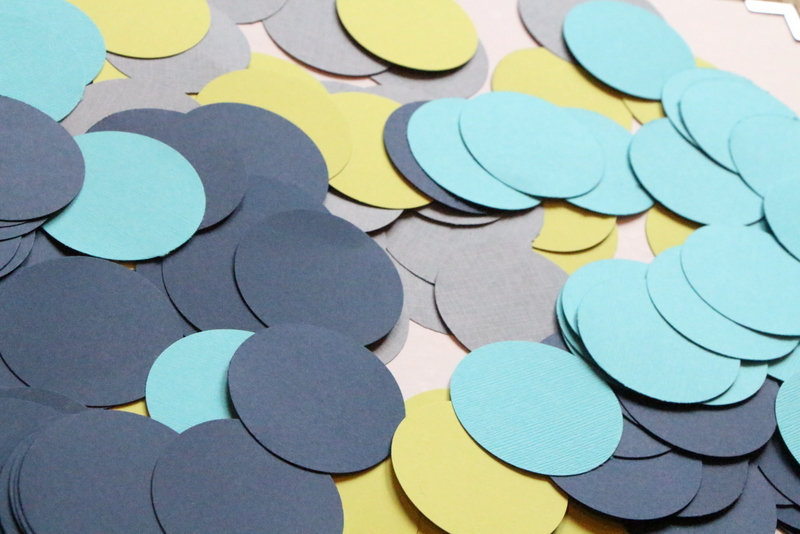
After I had enough of each color [I was able to get 30 circles per piece of paper, so 60 total of each color with plenty leftover], I began lining them up in the color order I wanted for each strand. Next, squeezed out the craft glue on the first circle down the middle and then made three horizontal lines across. Next, I laid the piece of clear string down and placed the same color circle on top to glue the string in between the 2 circles. I worked my way down, doing one circle or one mirror at a time until that strand was done.

After the top circle was placed on top of the bottom circle, I pressed down and smoothed out the glue with my fingers.


I basically did alternating strands of colors and number of circles and sizes of mirrors. I chose to do 3 circles, then a large mirror, then 2 circles and a medium mirror. The next strand was 2 circles, a large mirror, 2 circles, a large mirror, 2 circles and a small mirror at the bottom. I am not sure if this makes sense, but it was a random decision, so I just went with it!

I tied 4 strands from the top of the hoop together in a knot and then made another 3 inch loop above it. This is the loop that was hung from the ceiling hook. We hung it just above the side rail of the crib, so it is not directly over the mattress or crib itself.

There were 3 strands of each of the 4 colors evenly spaced & tied around the embroidery hoop. I think he’ll have a pretty good view, especially with the shiny, sparkly mirrors. Those will most definitely catch his little eyes 🙂
There are so many DIY Mobile tutorials on Pinterest and the internet. I browsed several and then combined techniques to come up with my design. Some people do multiple colored circles on each strand or varying shades of one color for the ombre´ look and some do alll strands the same length (mine varied slightly). If you decide to make one of these, the possibilities are endless. I also realized it doesn’t have to be perfect because it gently sways/twirls/spins from the ceiling so the flaws don’t show very easily… my kind of project.
*Update: If you haven’t had a chance to see the Bright & Bold Nursery Reveal yet, have a look!
As promised here is a bit a of a mother’s day recap from the weekend!
I am pretty sure my heart is still swollen & my cheeks still sore from smiling and laughing. I had such an awesome weekend. Saturday, we bought & planted flowers, shopped for patio furniture, went out to lunch, met friends for dinner and then ended the night listening to music out on the deck eating ice cream (me), while he had a drink :). Sunday was Starbucks in bed, coffee outside and an amazing beverage tub filled with presents & goodies. Ted then surprised me with Mother’s Day brunch reservations, insisted I take a post-meal nap and then picked up my favorite pizza for dinner. I realize I am very preggo, so the fact that I am extremely hormonal & emotional goes without saying, but he made me feel so incredibly special this Mother’s Day. He does an amazing job of thanking me regularly for all I do and telling me how lucky he is, but hearing those things really struck a chord yesterday. I also realized it was my last Mother’s Day as a “Mom of 1″…Sigh…
Yesterday at Brunch


Mother’s Day 2013… my very first…

[My mom, the biggest and me]
I wasn’t able to spend the weekend with my own mom, but was lucky enough to have her here for a couple of days last week and my mother-in-law was here for a night last week as well. They are both amazing women and I am very fortunate to have them in my life. The biggest and BBB#2 are 2 lucky little boys to have such a wonderful Mimi and Gigi too.

[My Mom (left), me, Henry & my Mother-in-law (right) taken in AZ, February 2014]
I hope to see you back here again soon!


This is our Bliss @ IHeart Organizing | This is our Bliss
February 4, 2015 at 3:39 PM[…] Reveal DIY Silver Dinosaurs DIY Curtains from bedsheets A to Z Bookends DIY Lampshade Nursery Mobile Pegboard Gallery Wall Free Nursery Word Art Printable Mustache Shadowbox “S” Marquee […]
2014 Highlights | This is our Bliss
January 9, 2015 at 4:01 PM[…] Sheets |2| DIY Nursery Project: Pegboard Gallery Wall |3| How to: DIY Hanging {Nursery} Letters |4| DIY Nursery Mobile |5| DIY Wood shelves & Gold […]
FREE Nursery Word Art Printable! | This is our Bliss
September 3, 2014 at 9:08 PM[…] a new reader over here, then you may have missed all of my past nursery project posts, such as the DIY Mobile, Marquee “S”, the Striped curtains & the Silver Dinosaurs. The printable I am […]
ABC… 123… Party Recap! | This is our Bliss
July 29, 2014 at 5:44 PM[…] beverage glasses. I printed numbers out on scrapbook paper, round paper punched them (like I did here) and then laminated them. After a simple hole punch & more of my trusty twine, they were tied […]
S is for Simon {DIY Marquee Letter} | This is our Bliss
June 4, 2014 at 8:11 PM[…] Striped curtains | Nursery closet | lampshade | Mustache shadow box | A to Z bookends | Silver Dinosaurs | Nursery Mobile […]
>>> Simon’s Nursery Reveal<<< | This is our Bliss
May 31, 2014 at 2:06 PM[…] Mobile – Tutorial here […]
Bliefnick, Theodore
May 13, 2014 at 12:02 PMHoney, this is awesome!
rbliefnick
May 13, 2014 at 1:26 PMThanks, babe!