5 Lessons I’ve Learned From Having My Kitchen Professionally Painted [Twice] // Kitchen + Family Room Refresh Update
Posted on October 21, 2021
Welcome to Week 4 of the Fall 2021 One Room Challenge! If you’re stopping by for the first time today or are just getting caught up, I’m participating in this challenge for the 5th time and we decided to refresh the Kitchen & Family Room in our new home in Arizona. We’ve made SO much progress since the challenge began the first week of October! Our kitchen is almost unrecognizable at this point!! The biggest change that has taken place so far is the painting of the Kitchen cabinets & Family Room built-ins. Today I’m sharing 5 Lessons I’ve Learned from Having my Kitchen Professionally Painted [twice]!
Plus a sneak peek of how things are looking!
To get caught up on the rest of the posts in the One Room Challenge, be sure to check them out here!
There was no update posted last week because it was a short work week after our 40th birthday Vegas weekend and then we left again last weekend for a friend’s wedding in Palm Springs. Finally coming up for air now!
When we bought our house, we knew someday we’d love to update the cabinets with a more fresh and modern look. We had such a great experience painting our Kitchen cabinets in our last house, we decided to plan on doing it again. We didn’t necessarily plan on updating our Kitchen this soon, but the opportunity to participate in the One Room Challenge is always so enticing and motivating.
It really gets the ball rolling with various room projects and keeps you on track with a deadline!
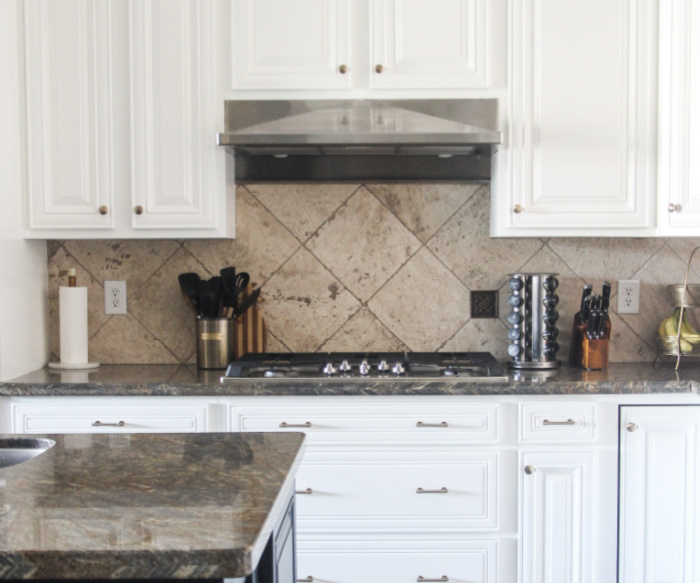
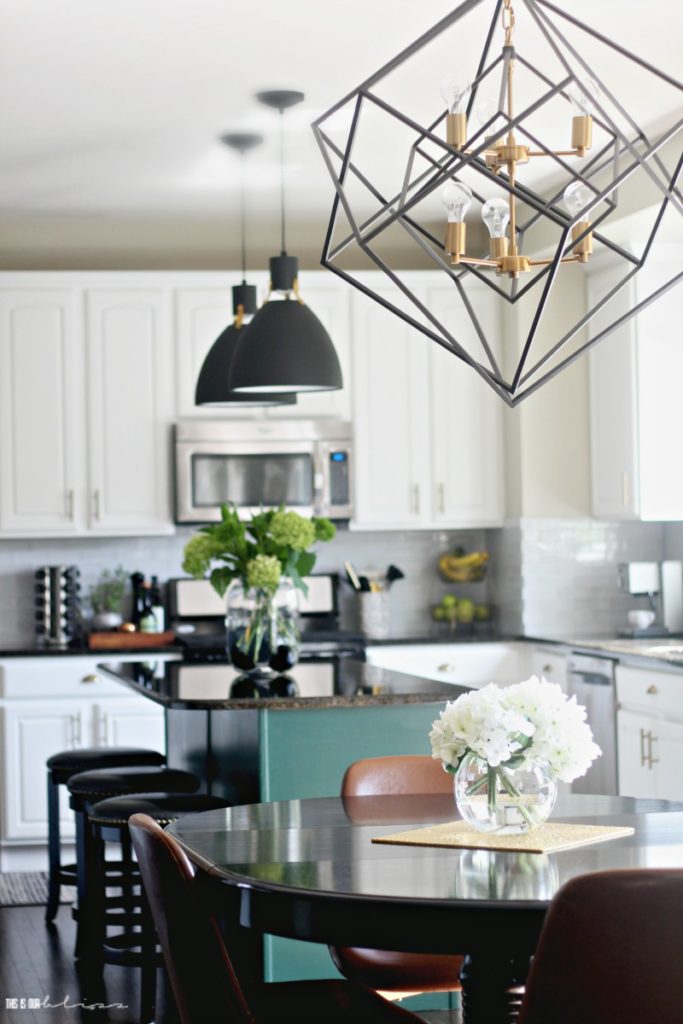
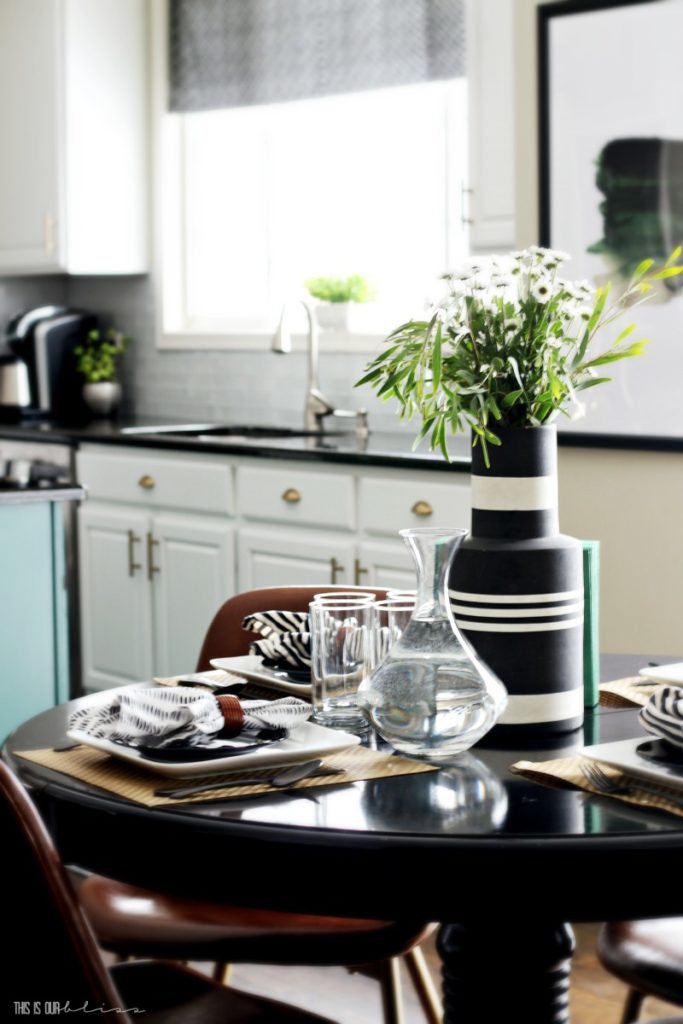
And now you can read on to hear my tips and see a sneak peek of our newly painted Kitchen. And at the end, I have a teaser of the Family Room built-ins too!!
5 LESSONS I’VE LEARNED FROM HAVING MY KITCHEN CABINETS PROFESSIONALLY PAINTED
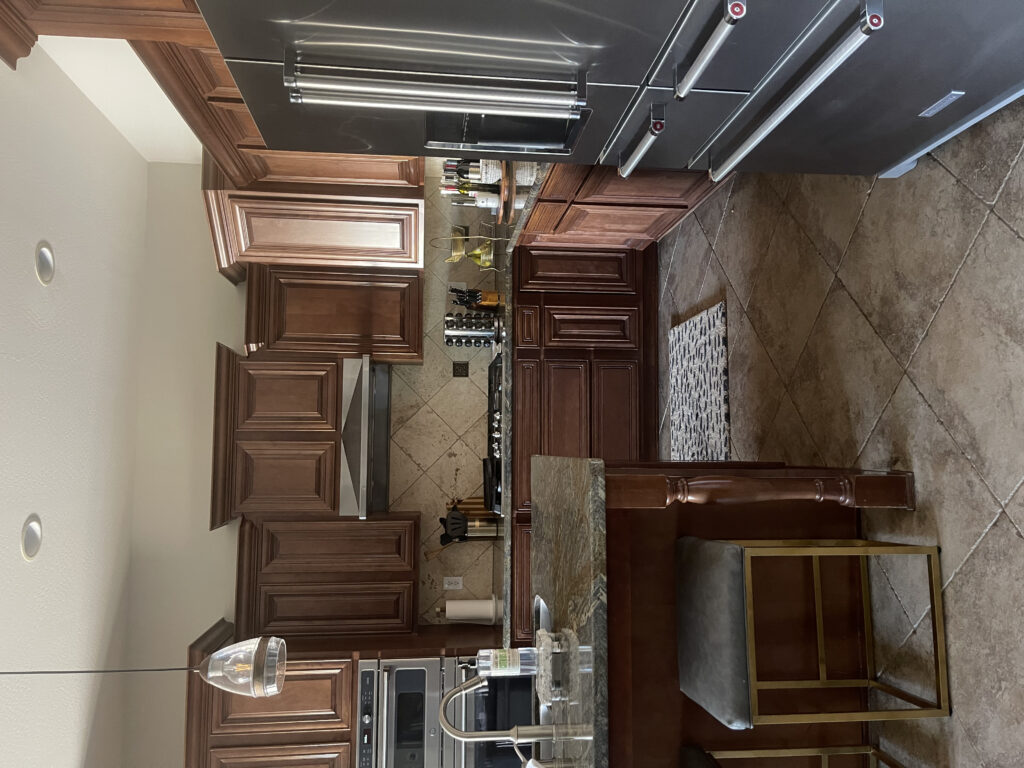
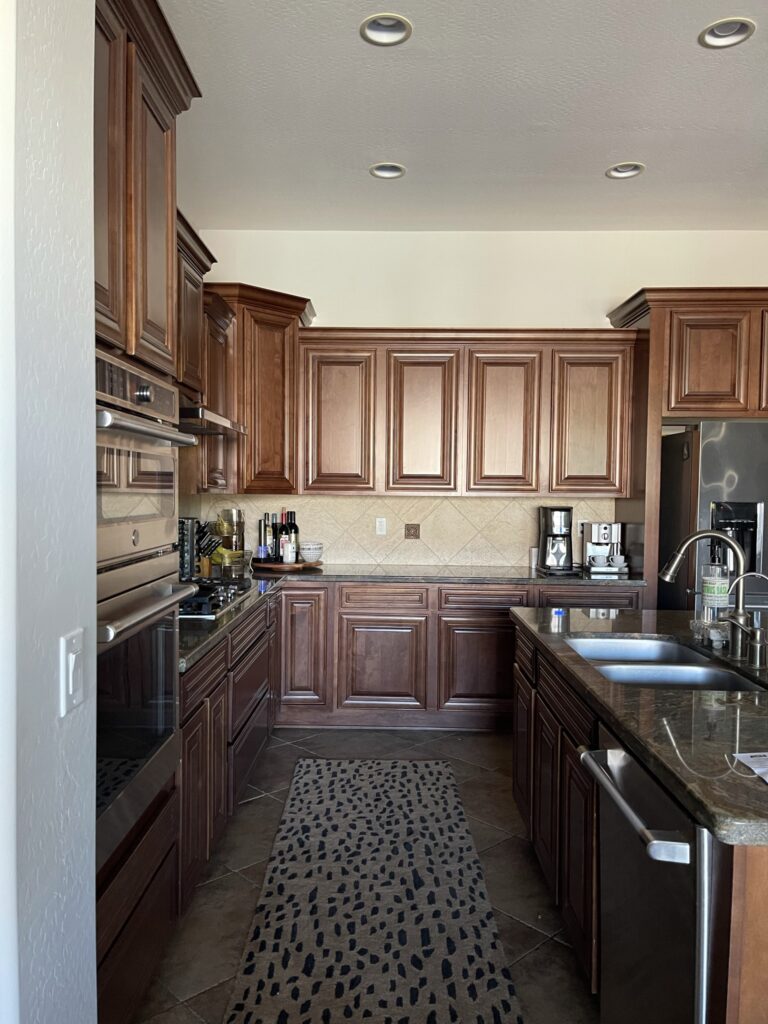
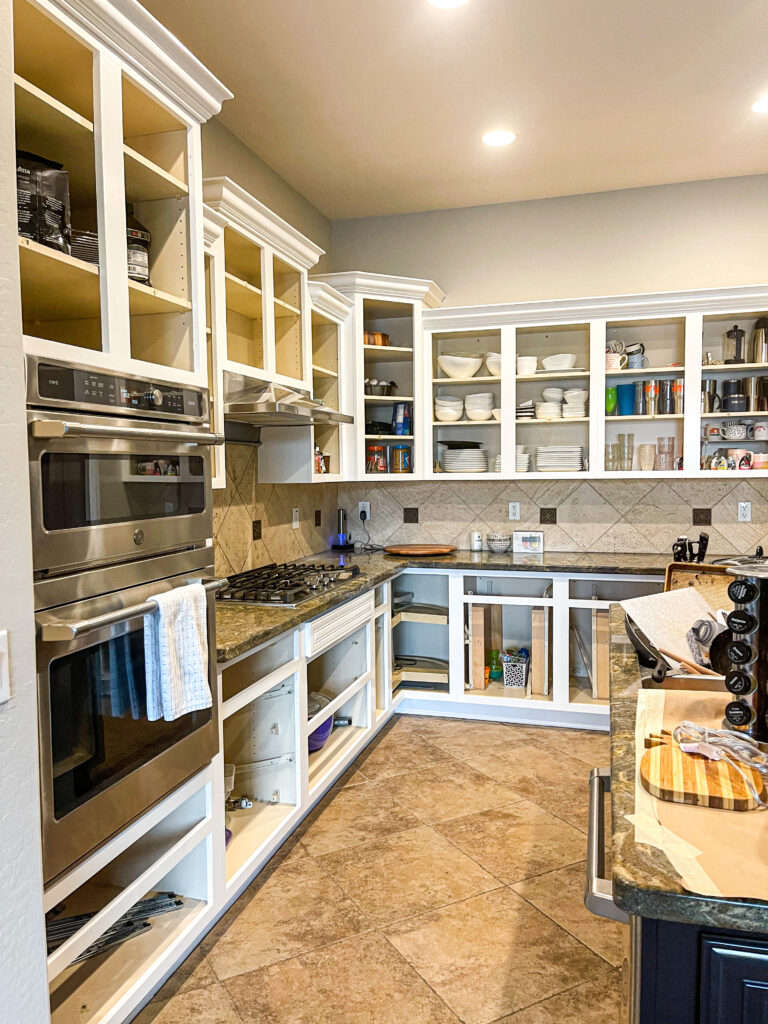
This week I wanted to share some tips with you in case you’ve ever thought about having your kitchen cabinets painted or are planning to do so in the future. We had high quality cabinets in our home that were still in excellent condition, so we never considered replacing them, but wanted to go white as opposed to the cherry wood tone that was there when we moved in.
We knew painting the cabinets would be the most cost effective solution to achieve the look we wanted.
I highly recommend you find a painter or contractor to do the work for you, but make sure you hire the right one. Look at sample doors they’ve painted before hiring them. It is the most critical step! I saw a sample door when we were searching for painters a few years ago and immediately knew I wasn’t happy with the quality.
And taking this project on yourself is doable, but I don’t recommend unless you have experience. Painting your walls or even a small bathroom vanity [as I have done many times] is far different than your entire kitchen. Its hard to hide a bad kitchen paint job, so I don’t recommend doing it!
1 // Utilize paint samples in order to be 100% sure of your color choice.
Its not just a flat square wall they are painting. It is your entire kitchen and you will look at it all day everyday. How many times are you in and out of your kitchen each day? A ton right?
Having your kitchen cabinets painted is a very intricate process and does take several days if not a week, so you want to make sure you plan accordingly. You want to see the color tested in your kitchen before they start work on the entire room. See how various shades look at various times of day and from different angles. Your friend’s kitchen cabinet color is going to look different in your kitchen based on window placement, direction the house faces, wall paint colors, lighting, etc.
Make sure you love the color in your home before ordering through your contractor or purchasing yourself.
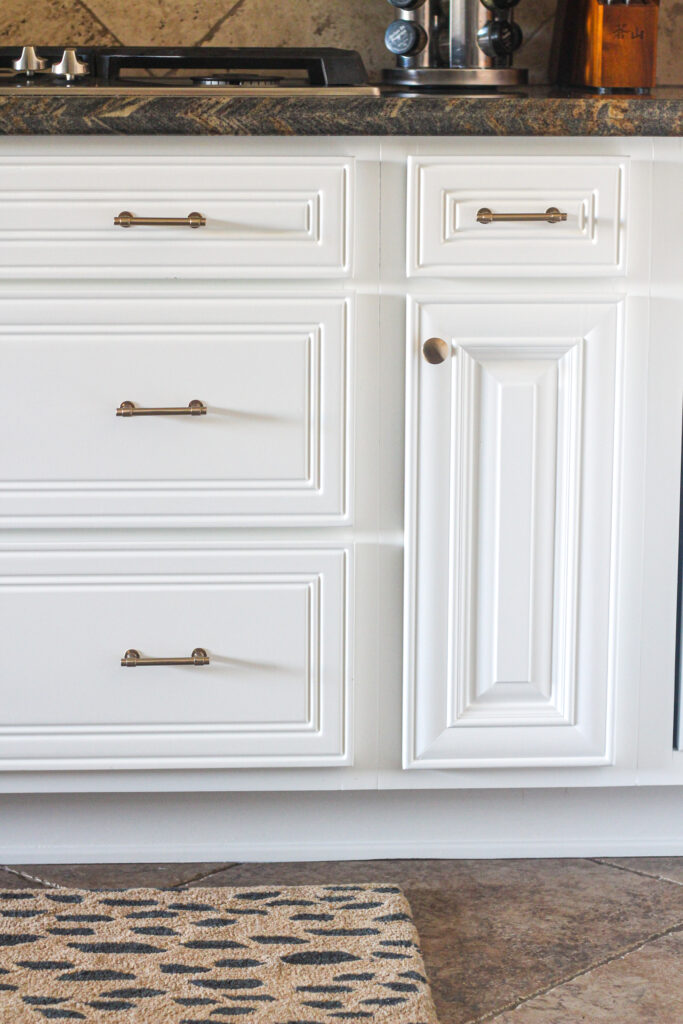
We went with Benjamin Moore Simply White [same as our last Kitchen] and are very happy with it again!
2 // Obtain multiple quotes and try to use a referral of someone you know.
Not only do you want to pay a fair price and work with someone you like & trust, but if you know someone who has personally used the painter or company before, you can actually view their kitchen to see the quality of the paint job.
A few things to ask / look for:
Can you see brush strokes or roller marks? – Make sure they plan to spray the cabinet doors & drawer fronts [the bases too, if possible!]
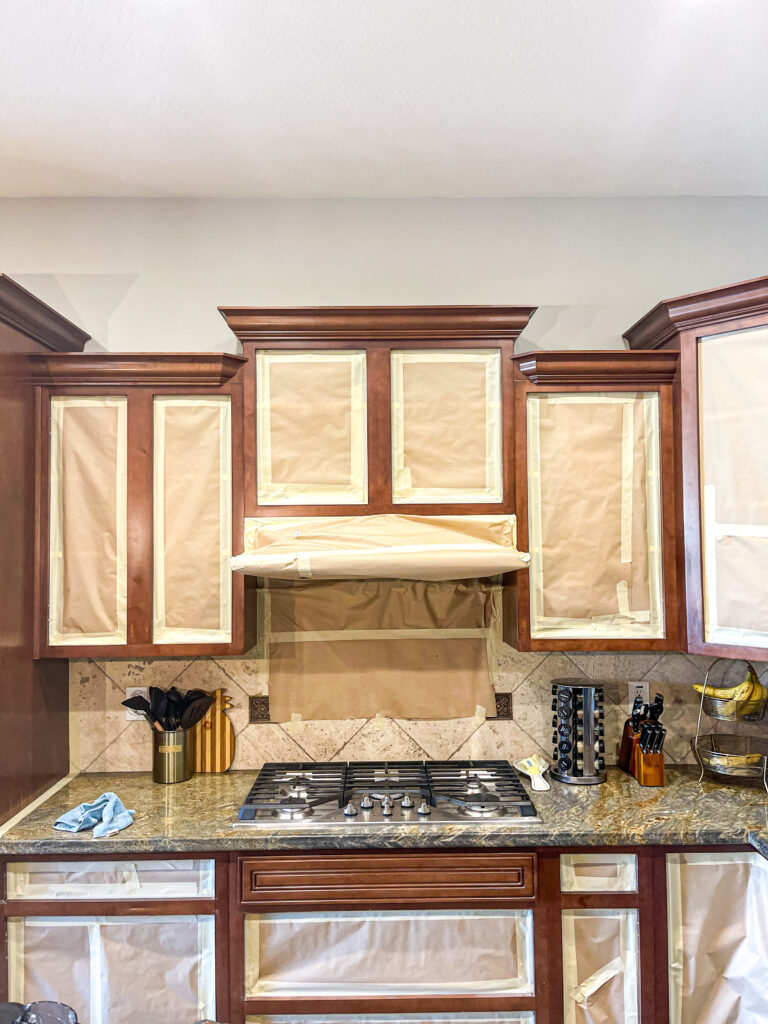
Where are they spraying? In your home with a shield? offsite? – They took my doors & drawer fronts off-site and let them cure a full 48 hours before bringing them back to install. Each door was individually wrapped for protection during transport.
How do they prep? sand, prime, paint?
Do they mark the location of each door & drawer so they return to their original spot? – ours just numbered a piece of masking tape on the frame so they knew where to install each door.
How long will the project take? – They taped & prepped for a day. Then they set-up paint shields for two days for sanding & painting and then we were without the doors & drawer fronts for another 5 days while they took them offsite. Another full day of installing doors and drilling for hardware.
3 // Know the full cost breakdown.
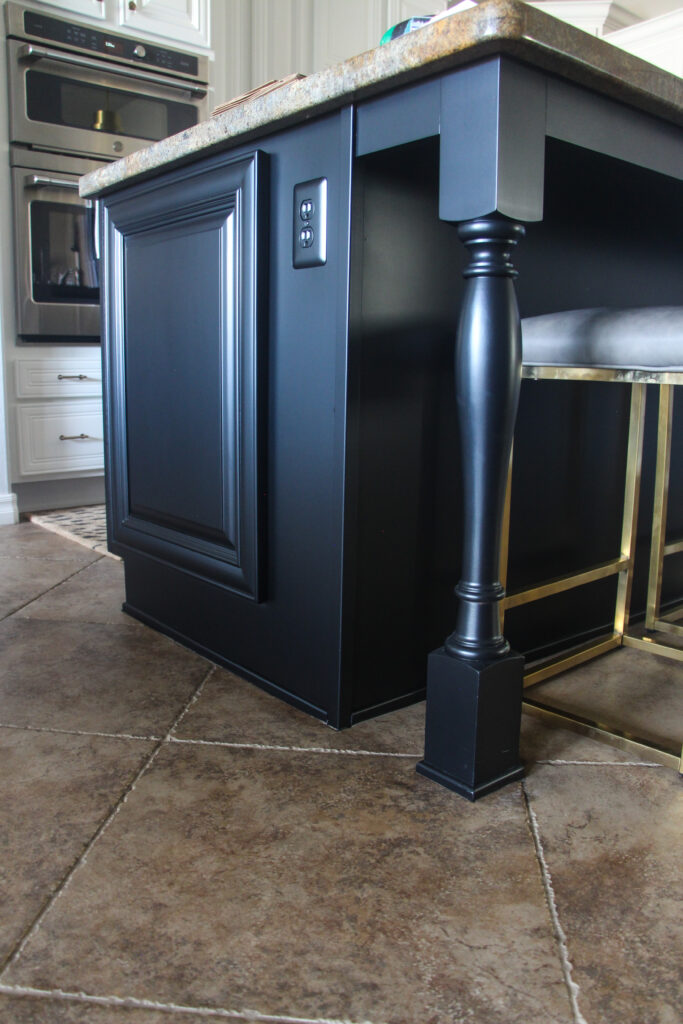
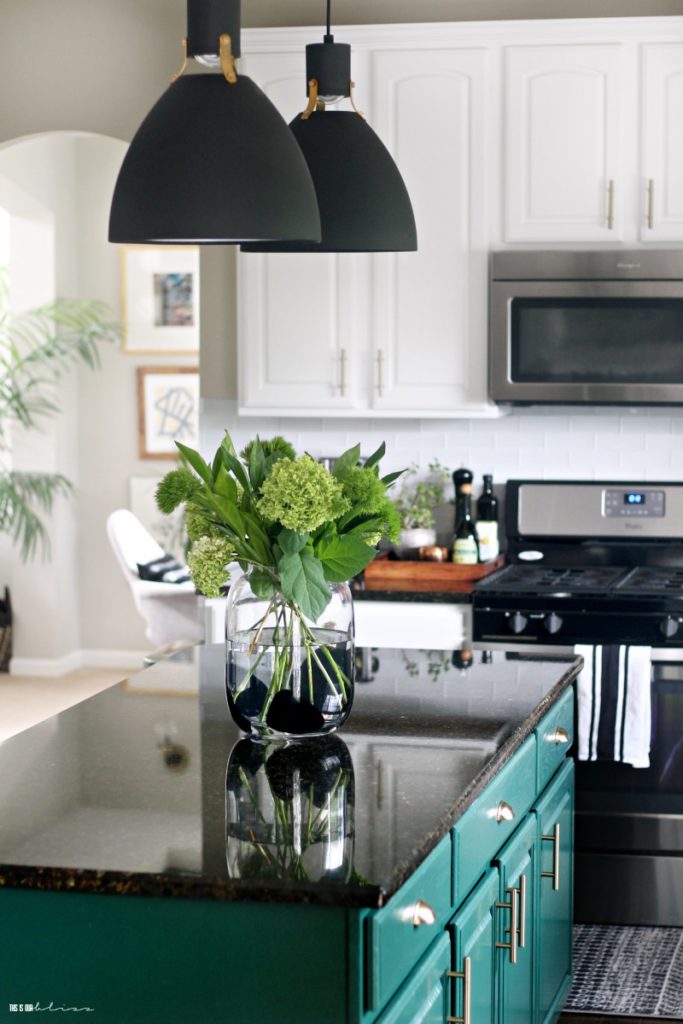
Some contractors will charge you to paint your island a different color than the rest of the kitchen. In our case here, they charged $150 and at our last house, the painter charged $250 for an additional color. Some will also be able to install your hardware. In our case, they drilled new holes to install new hardware since we didn’t have any on the doors & drawers here previously.
They charged $150 for this and it was 100% worth it.
4 // Make sure they don’t colormatch your paint selection at another paint retailer
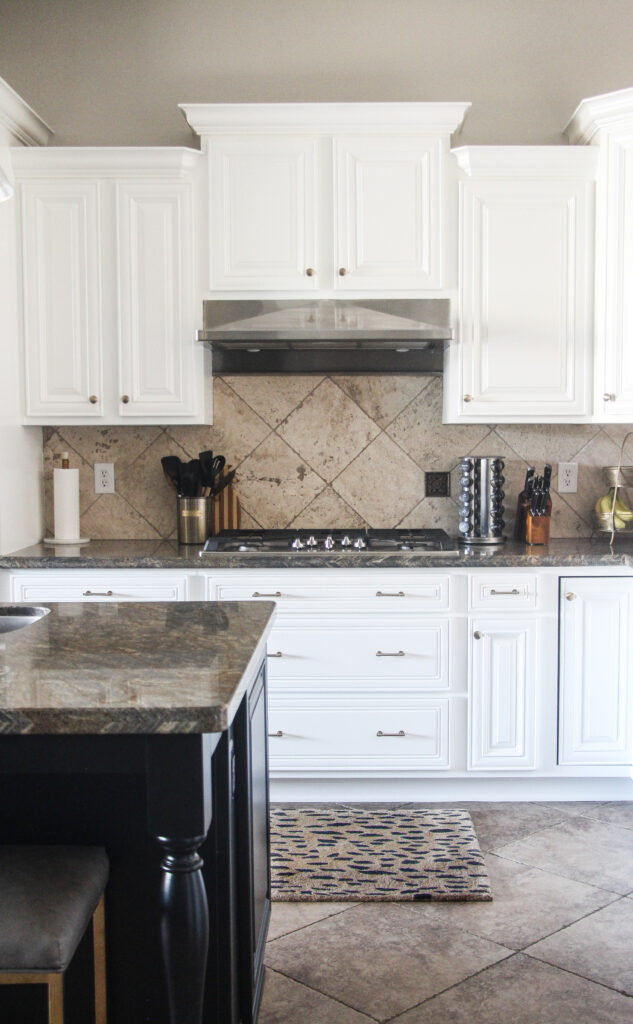
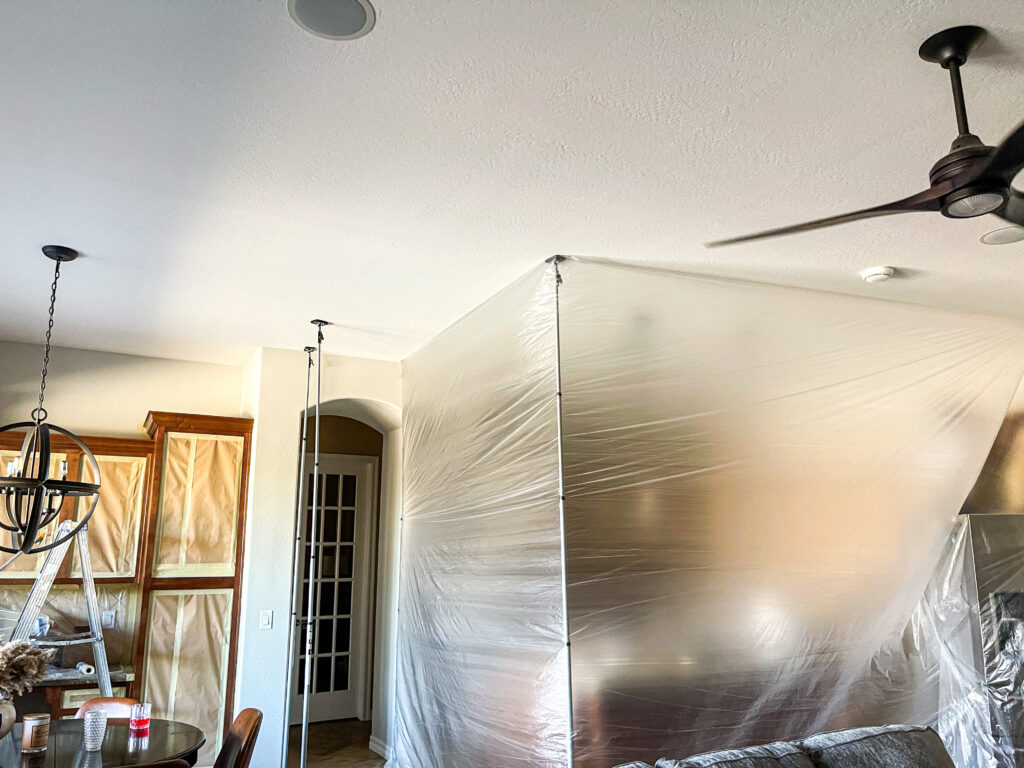
BIG lesson learned here. Our island had to be painted 3 times! The first time they painted it, the color was wrong. Since I was using SW Tricorn Black, a color I’ve worked with for years [and had every single interior door in our last house painted in that color], I instantly knew it was wrong when the pulled the plastic paint tents down. It wasn’t a true black, but more of a dark gray. I did actually really like the color, but it wasn’t what I wanted. Knowing I would pass by my island every single day and wish it was darker.
I found out that they went to Ace Hardware & had the Sherwin Williams Tricorn black colormatched with Sherwin Williams paint. They did this due to the paint shortage in the Valley. Many of the SW stores were out of the dark base for the type of paint used on cabinets. Normally, alternative retailers do a pretty good job at matching the color selection since they have competitor’s colors digitally programmed in their system. I’m not sure what the issue was here, but it came out wrong. After they found a SW with the correct supplies, they came back to repaint it. No less than an hour after they left – we smudged it!! UGH! Someone leaned up too close on the side, and the bar stools got pushed back in under the island which left marks, as well.
Which leads me to my next lesson.
5 // Paint takes at least a full 24-48 hours to cure, so be extremely careful!
We tried our very best to keep the kids away from the wet paint, but after the painters took down their paint tents and left, I didn’t do anything to prevent the kids [or us] from touching the wet paint. The island was the only place that took a hit. Probably because it’s a place you lean up against without even thinking! Also, like I mentioned, our counter stools were put back underneath the island and nicked the wet paint. I should have taken the stools to another room completely. I think the boys were just trying to help tidy up!
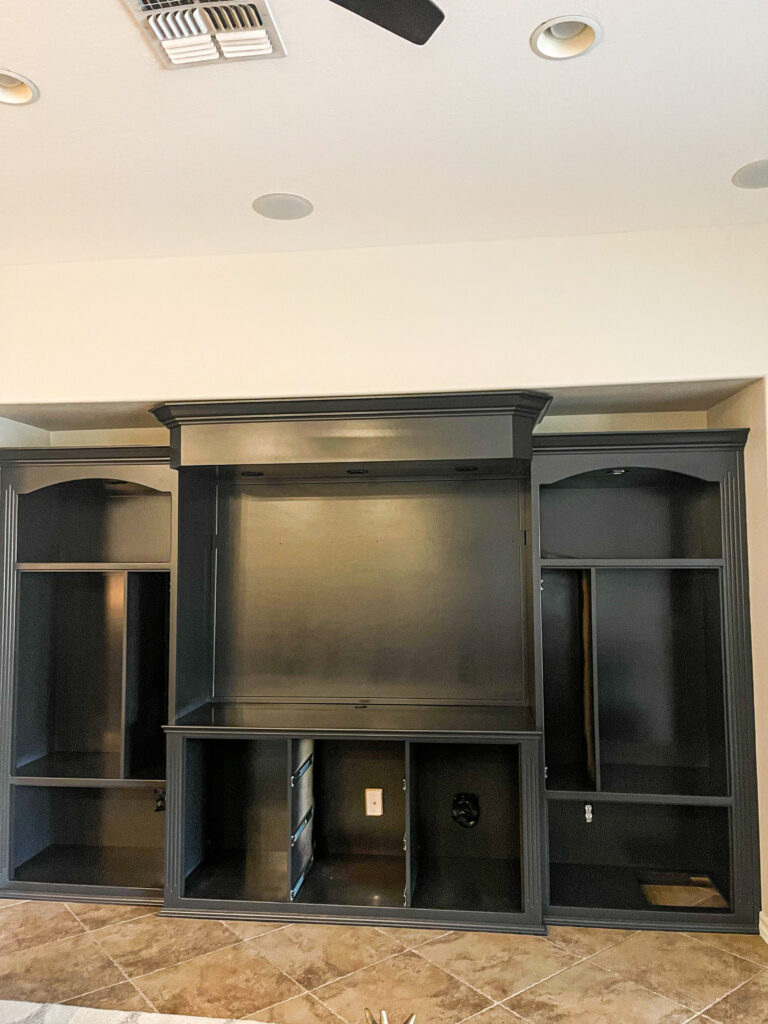
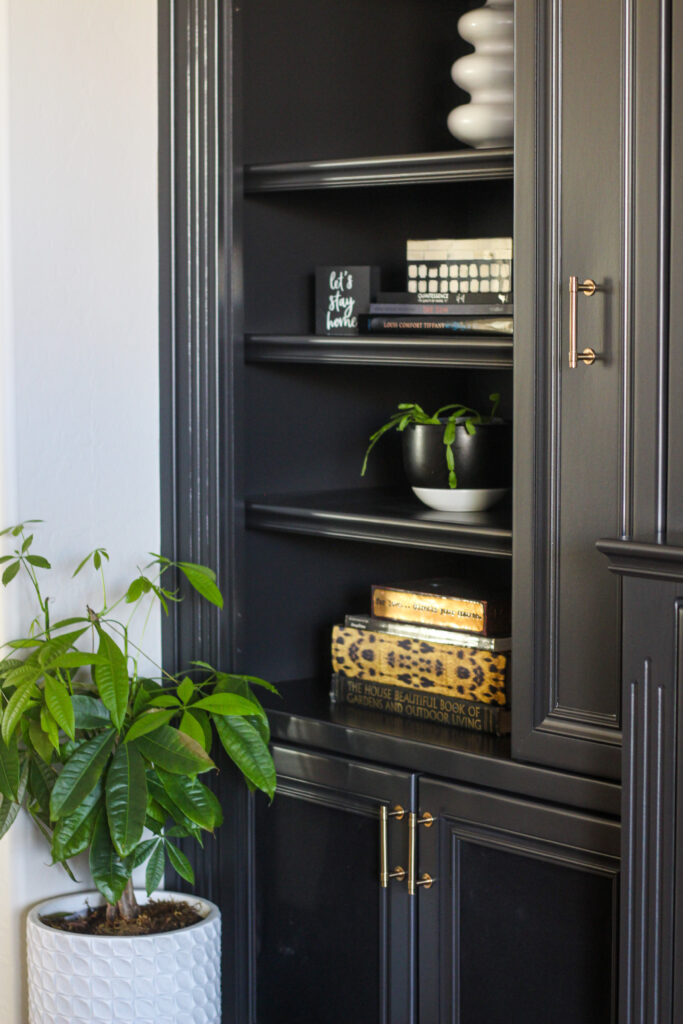
And in case you missed it, we are also refreshing our Family Room at the same time. Part of the refresh included painting the built-ins in the Family Room. I am actually obsessed with how it turned out in here!
The dark paint feels moody and fabulous. I can’t wait to show you more of these spaces next week!
Feel free to leave any other questions for me in the comment section of this post. I am not a professional, but am happy to share more about our experience with hiring our kitchen cabinet painting.
I also have some wonderful sponsors to thank for partnering with me on this challenge. A big shout out to Minted, Hudson Valley Lighting and Liberty Hardware for their continued support over the years. I truly couldn’t do these projects without them!
[…] here ORC Week 2: Kitchen + Family Room design plans + mood boards ORC Week 4: 5 Lessons I’ve Learned from Having my Kitchen Cabinets Professionally Painted ORC Week 5: New Kitchen Lights ORC Week 6: The Best Neutral Vases for Styling Your […]
[…] ORC Week 1: Kitchen + Family Room Refresh before photos here ORC Week 2: Kitchen + Family Room design plans + mood boards ORC Week 4: 5 Lessons I’ve Learned from Having my Kitchen Cabinets Professionally Painted […]
Nan, Odessa, DE
October 21, 2021 at 12:18 PM
Please share what you presented to get your quotes from each company. I find this is an important beginning. As each company comes to quote I find they are all adding deleting from what is expected. Therefore the pricing differs.
Help! What do you get in writing from the chosen company? How much payment is paid up front?

 1 // Utilize paint samples in order to be 100% sure of your color choice.
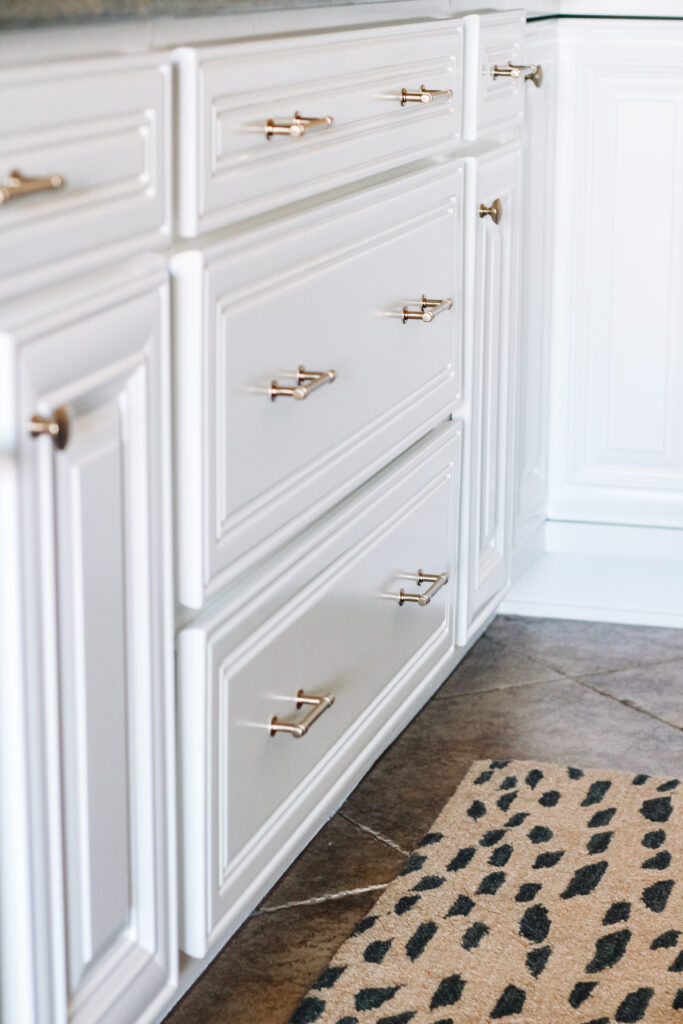


Statement Art + How I Styled our Built-ins - This is our Bliss
November 12, 2021 at 2:36 PM[…] here ORC Week 2: Kitchen + Family Room design plans + mood boards ORC Week 4: 5 Lessons I’ve Learned from Having my Kitchen Cabinets Professionally Painted ORC Week 5: New Kitchen Lights ORC Week 6: The Best Neutral Vases for Styling Your […]
The Best Neutral Vases for Styling Your Home - This is our Bliss
November 4, 2021 at 11:35 AM[…] ORC Week 1: Kitchen + Family Room Refresh before photos here ORC Week 2: Kitchen + Family Room design plans + mood boards ORC Week 4: 5 Lessons I’ve Learned from Having my Kitchen Cabinets Professionally Painted […]
New Kitchen Lights // ORC Week 5 Update - This is our Bliss
October 28, 2021 at 12:54 PM[…] ORC Week 1: Kitchen + Family Room Refresh before photos here ORC Week 2: Kitchen + Family Room design plans + mood boards ORC Week 4: 5 Lessons I’ve Learned from Having my Kitchen Cabinets Professionally Painted […]
Nan, Odessa, DE
October 21, 2021 at 12:18 PMPlease share what you presented to get your quotes from each company. I find this is an important beginning. As each company comes to quote I find they are all adding deleting from what is expected. Therefore the pricing differs.
Help! What do you get in writing from the chosen company? How much payment is paid up front?