Another item checked off the One Room Challenge list! We’ve been busy working on our bedroom which is a good thing because we are nearing the end! I’m back with a week 6 update and a quick tutorial for How to DIY a Large Statement Art Piece for Over Your Bed!
For more DIY art ideas, go here and for more bedroom inspiration, click here.
It is Week 6 of the Fall 2022 One Room Challenge and if you’re just tuning in, I am putting the finishing touches on our Primary Bedroom in the new house. We moved from Illinois to Arizona in July of 2021 and I have been working my way around our home trying to add my personal touch to each space.

The Bi-annual One Room Challenge is a great opportunity to get some work done. I love to jump into at least a couple of challenges each year because there is nothing like a deadline to get you moving into high gear!
This is my 7th time participating, so there are lots and lots of projects and Room Reveals in the archives 😉
You can get caught up on all of the One Room Challenge posts here or by clicking on any of the posts below:
WEEK 1 // PRIMARY BEDROOM DESIGN BOARD
WEEK 2 // BEFORE PHOTOS OF THE PRIMARY BEDROOM
WEEK 4 // OUR MOODY WALLPAPER ACCENT WALL
WEEK 5 // HOW TO CREATE A COZY READING NOOK IN YOUR BEDROOM
WEEK 6 // HOW TO DIY A LARGE STATEMENT ART PIECE FOR UNDER $100
HOW TO DIY A LARGE STATEMENT ART PIECE FOR UNDER $100
Do you remember the 2 windows over our bed from when I shared the before photos of our room?
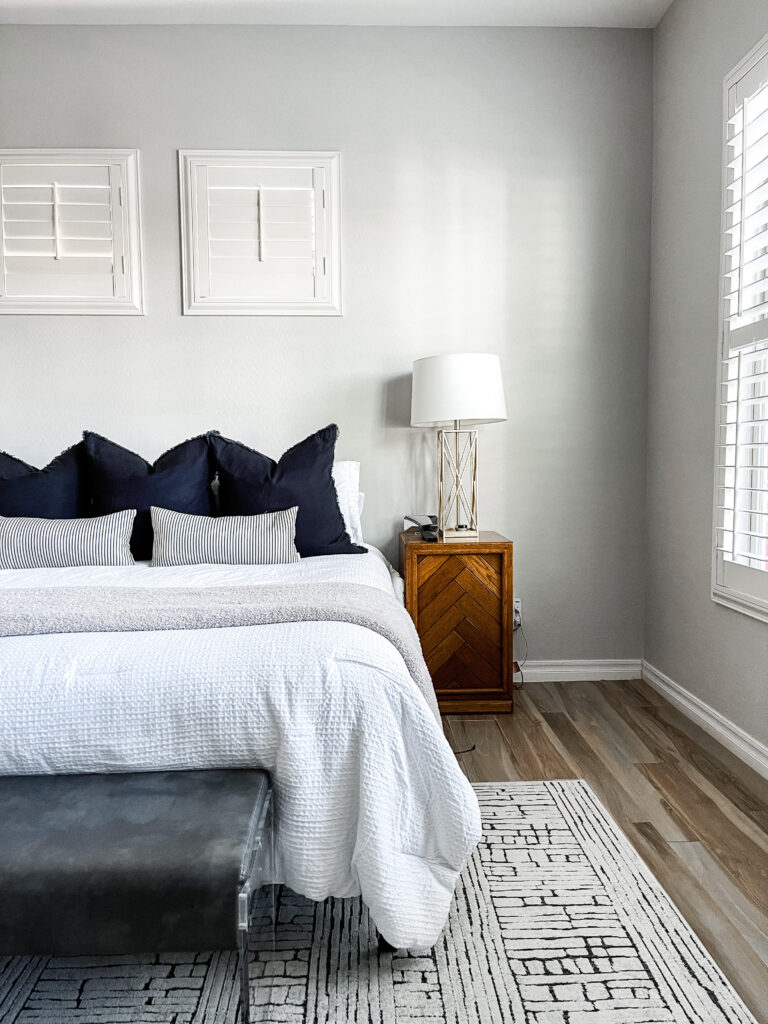
I’ve always thought it was such odd placement for windows and they drove me nuts. We never open the shutters because we get plenty of light from the wall of windows adjacent to our bed.
And then after the wallpaper went up, I really disliked them!
Several months ago, while brainstorming ways to disguise the windows over the bed, I came up with an idea.
It wasn’t until I decided to jump into the challenge that I knew it was time to try out my method!
Here was my idea…
I knew a regular frame or canvas wouldn’t fit over the plantation shutters and I didn’t exactly want to remove them and store them [in order to have them if we ever sell our home]. Otherwise, I would’ve been stalking thrift stores or Goodwill for large art pieces.
But I had another idea. A way to make a large art piece and not spend a lot of money!
I started searching for large wall tapestries or fabric to wrap around a DIY wood frame. I knew I needed to build a frame with pieces of wood that would extend out at least a couple of inches from the wall to fit over the plantation shutters. I would measure around the window in order to determine the full dimensions of the piece.
When I discovered this print, I knew it was the one! You actually saw it in my mood board and now you get to see how I made that vision come to life!
SUPPLIES NEEDED FOR DIY LARGE STATEMENT ART
- wood – we used 1″x3″ pieces
- drill
- large wall tapestry, fabric, etc. [I used this one in the 68” x 80″ option]
- staple gun
- scissors
- 2 D-ring picture hangers 2 picture hanging hooks with nails
- hammer
DIRECTIONS FOR DIY LARGE STATEMENT ART
STEP 1 // Select your wall tapestry.
I got my tapestry from Society 6. They are a great resource for this type of project!

There are so many options to choose from. Make sure to measure and decide what size of art you’d like to create and then order a big enough size to wrap around your wood frame. You will lose some of the design when cutting it to size and then wrapping it, so just know that going into it.
I needed something at least 72 inches wide to cover both of the windows.
The 68″x80″ was the best option for me. This size is curretnly 30% off making it under $50
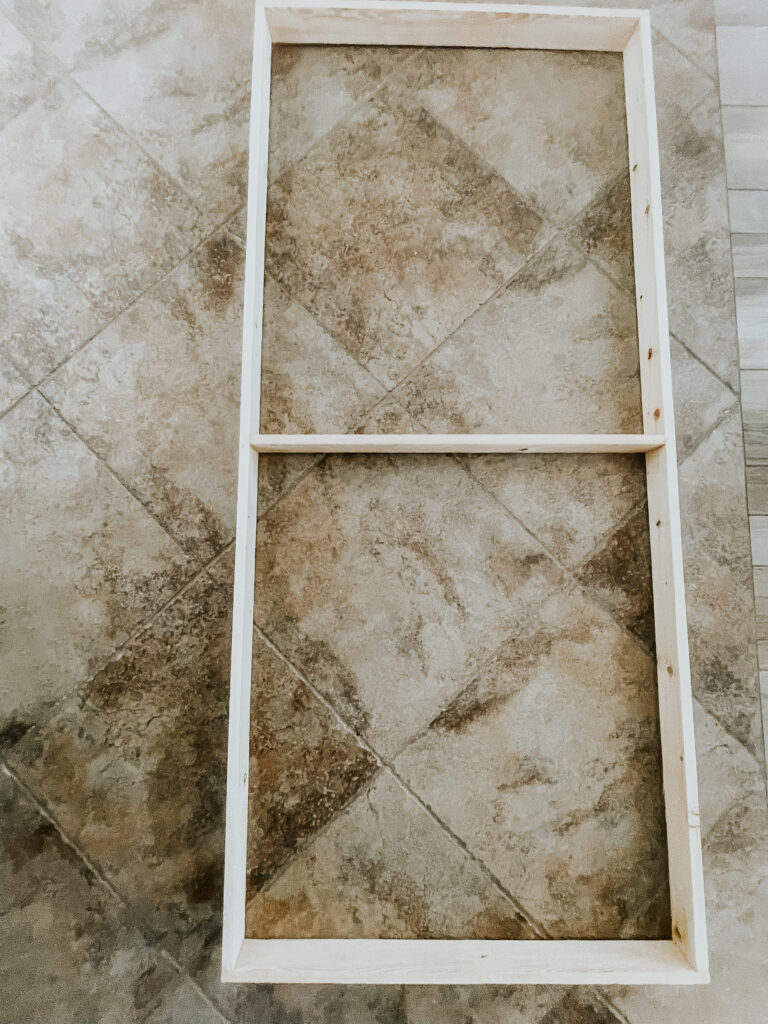
STEP 2 // Build your frame.
I enlisted my Dad’s help on this project and he offered to build the frame for me. He used pieces of 1″x3″ wood and cut them to size. He also added a center support piece to help keep the tapestry from drooping and it would fit right between the 2 windows.
STEP 3 // Lay out your tapestry to determine how you want it to look on the wall
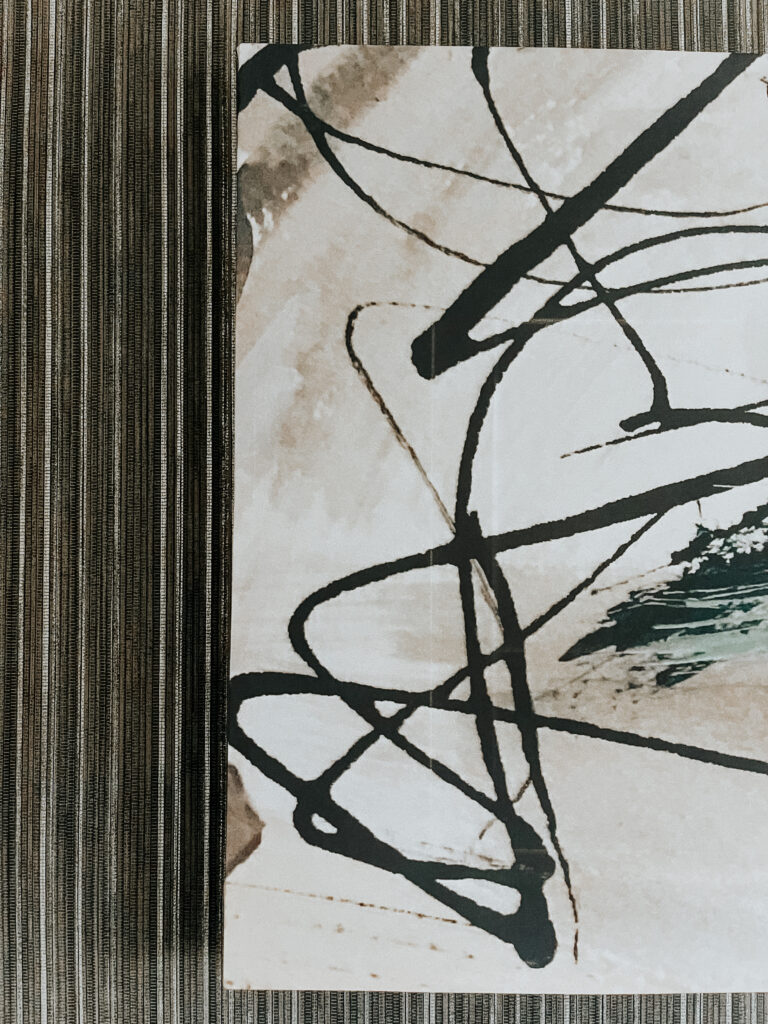
Since we knew we’d have to cut off quite a bit of the print, we laid it out to get an idea of how it would look on the wall. I knew I wanted to keep a lot of the squiggly black design in the corner and I also wanted to see some of the tans at the bottom.
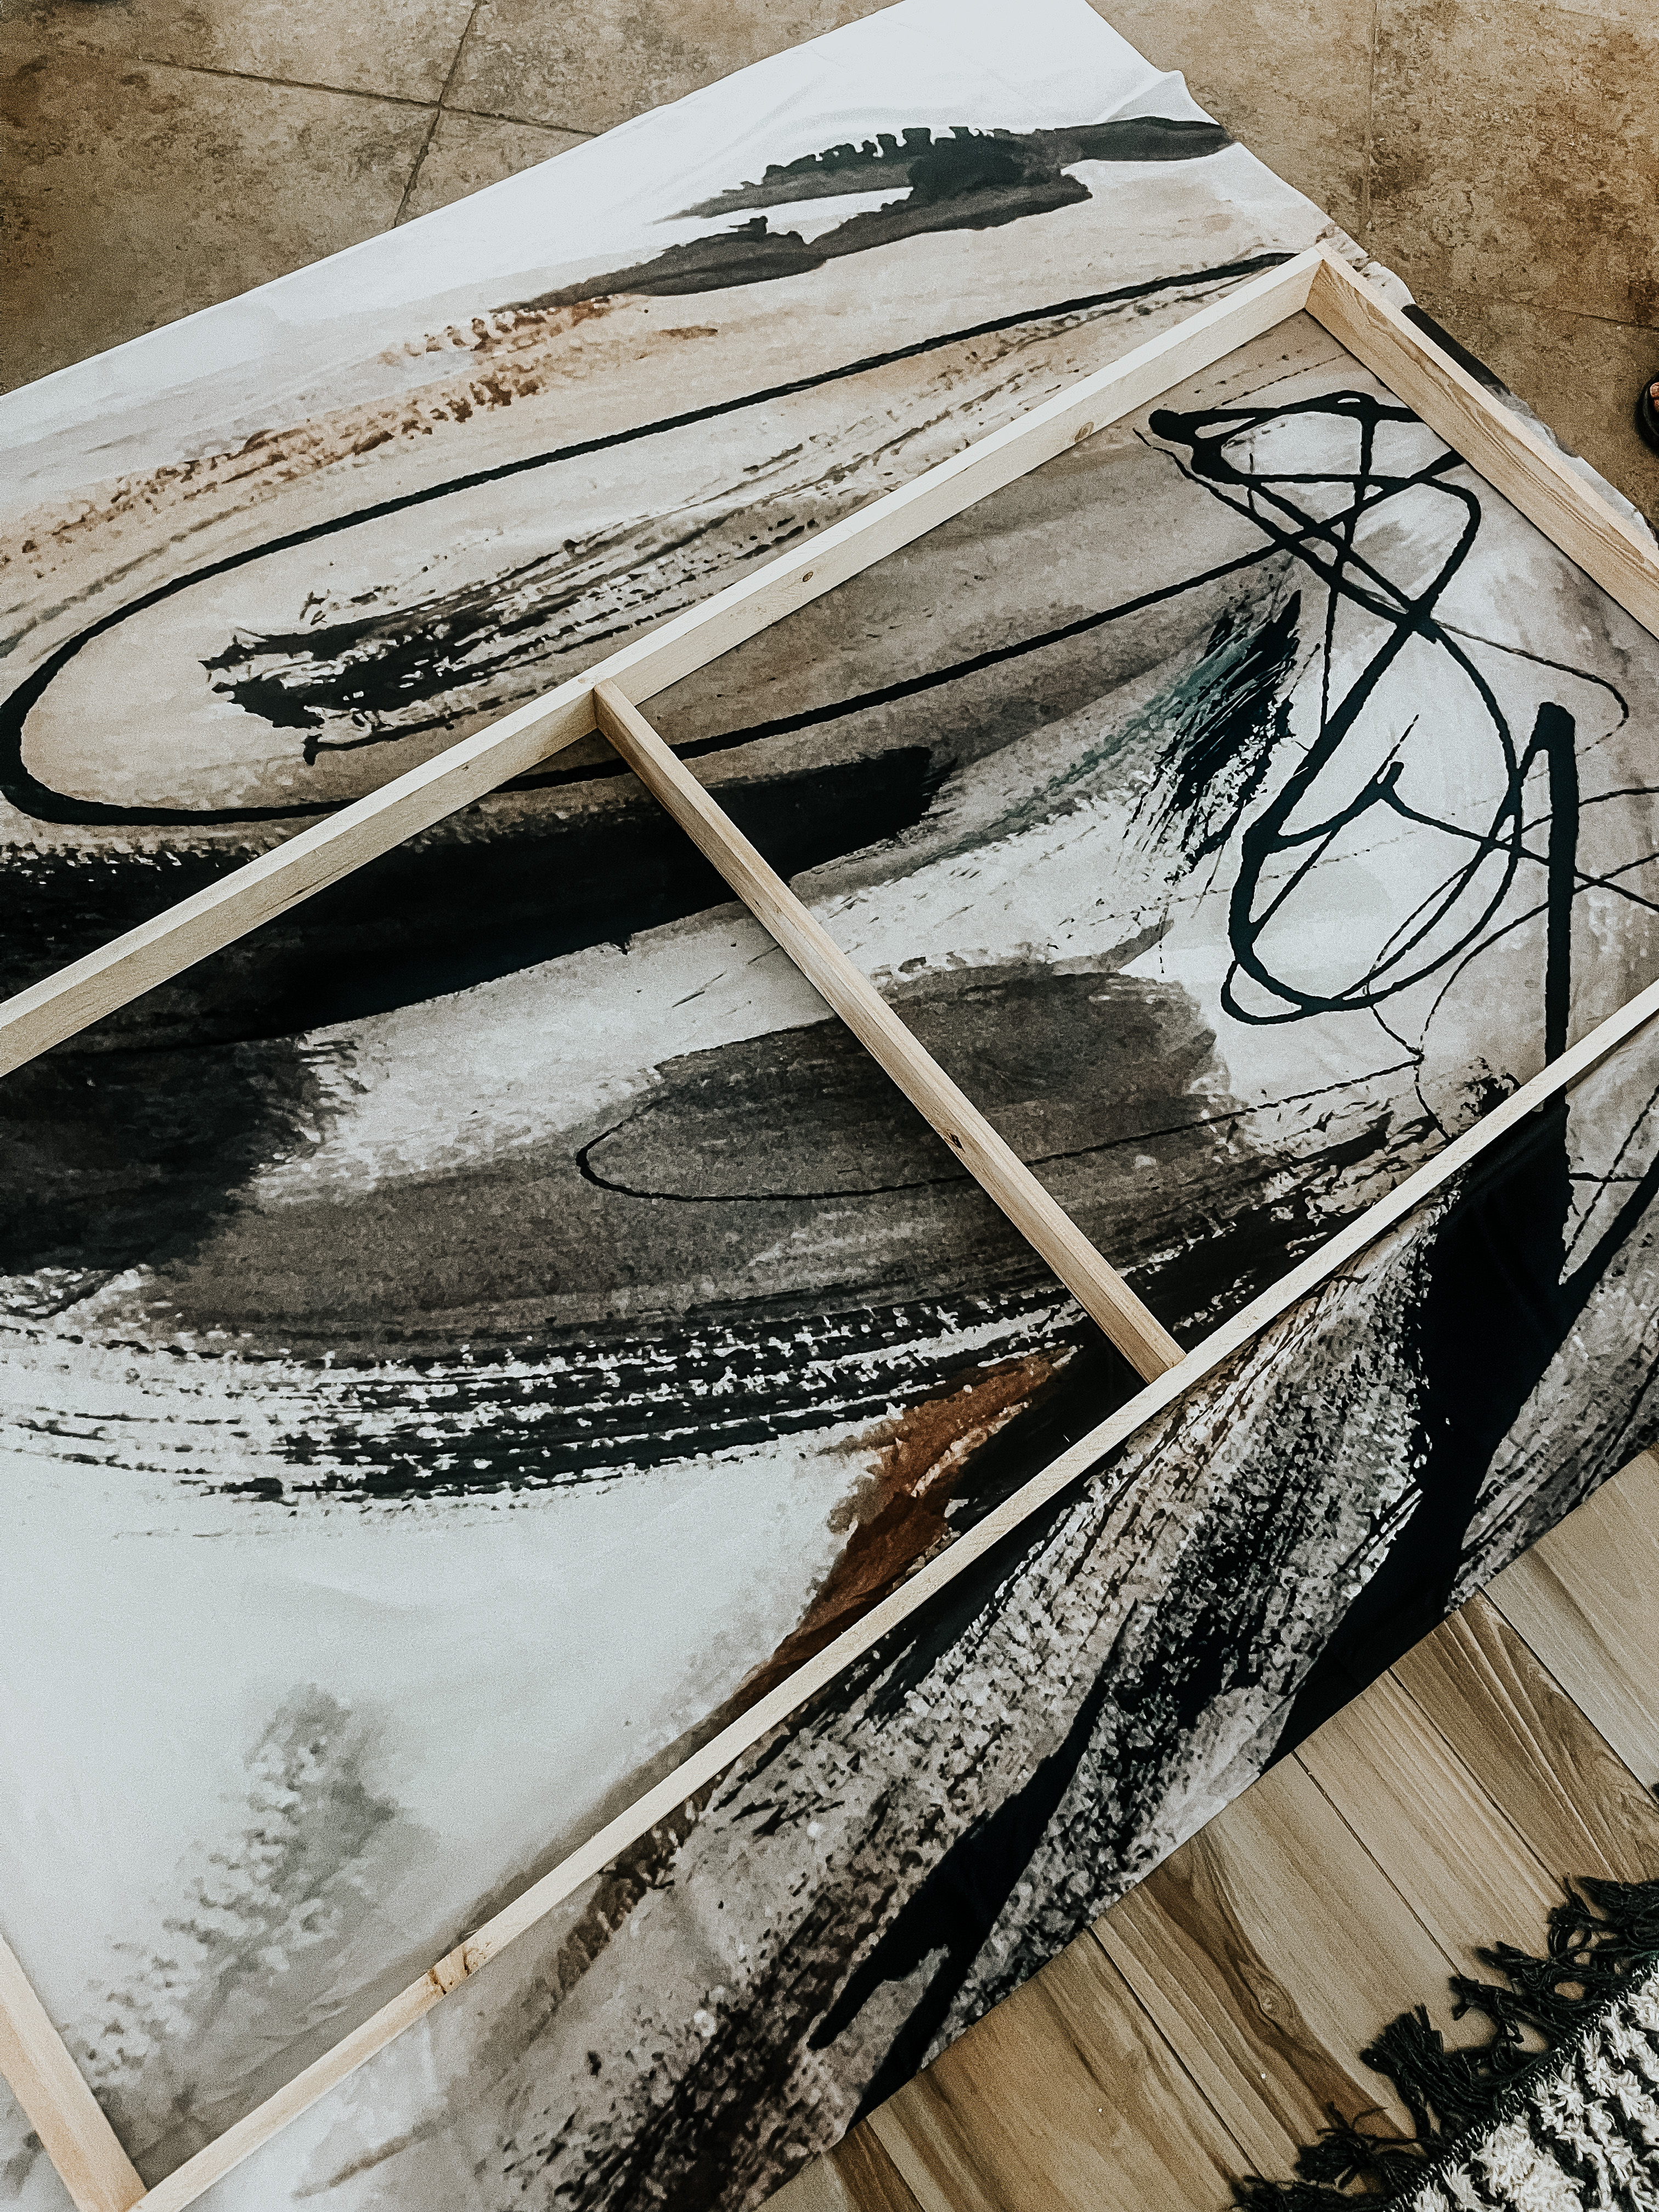
I also really wanted to keep the little brown spot at the top.
Play with it until you get it right. Then place your tapestry face-down and place the frame on top.
STEP 4 // Stretch the tapestry around the frame and secure it with staples.
It helps to have 2 people for this step. I helped hold the fabric taught while my dad put in the staples He started on the long side and then did the other long side.
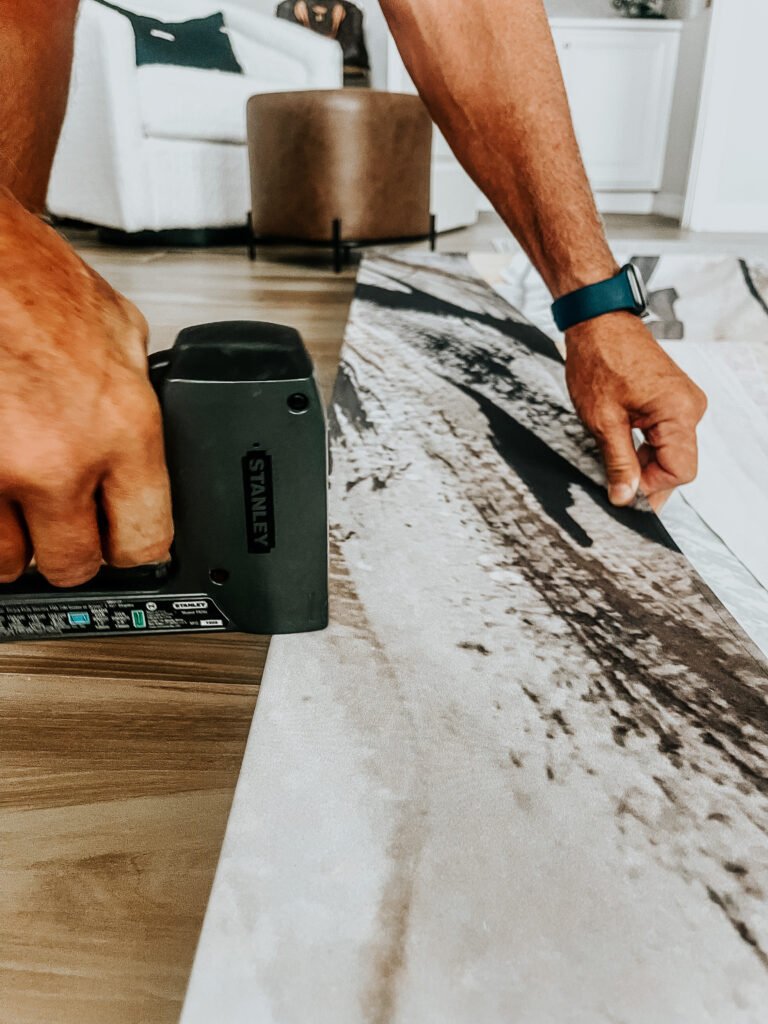
I wrapped the corners by folding the top down and bringing the bottom up at an angle – almost like you fold the corners of your top sheet at the bottom when you make your bed. I held it secure and then we stapled the corners into place.
Cut off the excess fabric around the perimeter AND NOW YOU’RE READY TO HANG! As I mentioned, my tapestry was 68″ x 80″ and the final product measures 72″ x 32″ so I had a decent amount to trim even after stretching and wrapping.
STEP 5 // Add the d-rings to the sides of your piece and hang on the wall
We drilled a d-ring about 1/3 of the way down on the 2 sides and then nailed in the picture hanger to the wall.
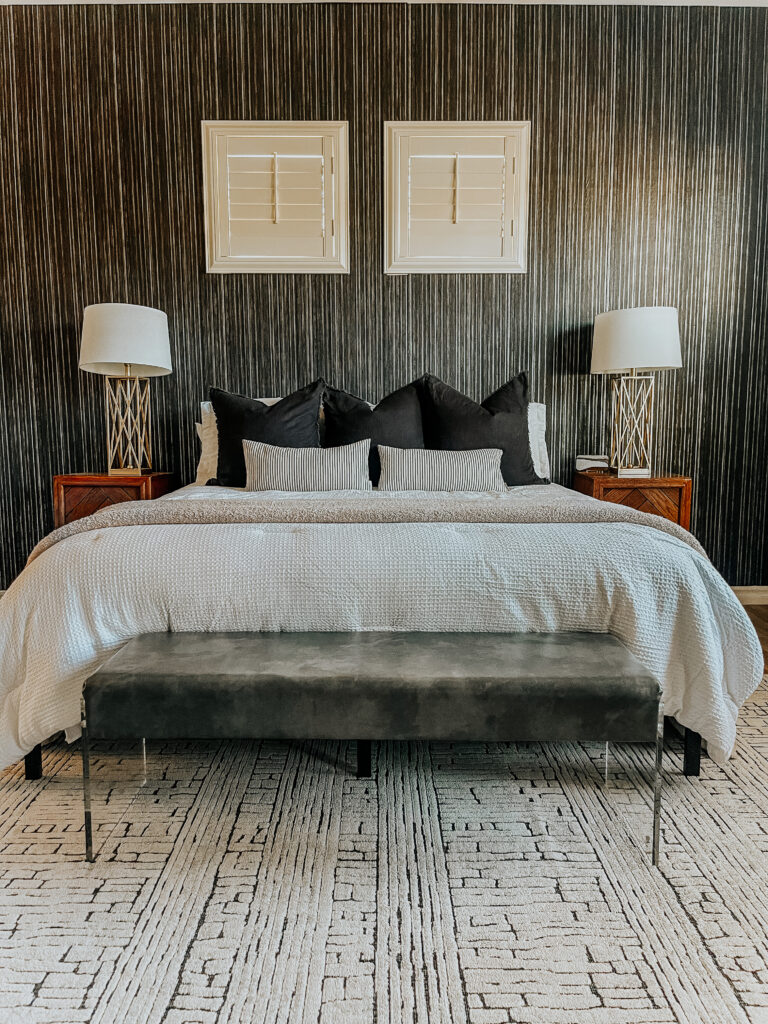
We lifted the piece onto the hooks and voila!
No more windows!
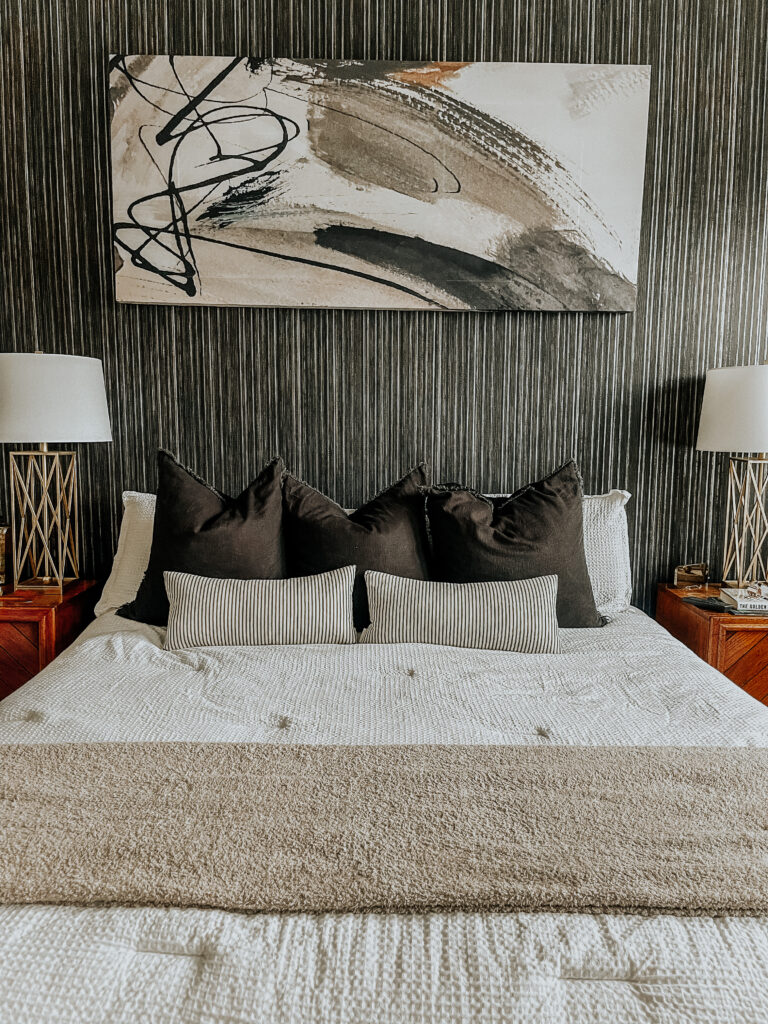
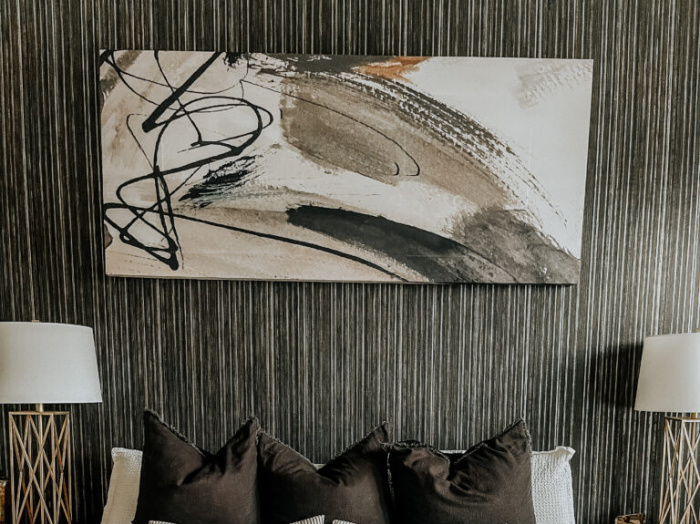
I absolutely love how it looks above the bed and on top of the wallpaper! I really wasn’t sure if this idea would turn out, but I’m so glad we gave it a shot.
And at under $80 all in, I just might be making more large statement pieces using this method.
The largest size of tapestry measures 100″ wide and I have another project idea up my sleeve using that size!
Want in on a little secret?
The fabric is a little sheer so you can see some of the light coming in from the window, but its hard to tell unless you’re at a certain angle. I may end up taking it down and adding posterboard or foam core behind the fabric. If you’re not covering a window, it won’t matter at all!


HERE IS A LOOK AT OUR PRIMARY BEDROOM PLANS AND CHECKLIST:
add a wallpaper accent wall- get a headboard? – found one! Just need to assemble it
- replace table lamps – still shopping
- new nightstands? [larger would be ideal] – still searching
swap ceiling fan– it was installed this week!- replace the rug – arrived, need to put it in place
- add window treatments – arrived, need to install
create a large DIY art piececreate a cozy nook in the corner w/ an accent chair – pieces arrived, need to install- style the dresser and nightstands
- MISC. projects:
- __________________________
- __________________________
We have less than 2 weeks left until the big Reveal, but I actually think we’re in pretty good shape! Most of the big items are taken care of, so I’ll be working to finish up installs, and styling and then start the process of photographing and editing for the reveal post.
This space has come SO far already, but I can’t wait to get it over the finish line just in time for the holidays 🙂
You can get caught up on all of the One Room Challenge posts here or by clicking on any of the posts below:
WEEK 1 // PRIMARY BEDROOM DESIGN BOARD
WEEK 2 // BEFORE PHOTOS OF THE PRIMARY BEDROOM
WEEK 4 // OUR MOODY WALLPAPER ACCENT WALL
WEEK 5 // HOW TO CREATE A COZY READING NOOK IN YOUR BEDROOM
WEEK 6 // HOW TO DIY A LARGE STATEMENT ART PIECE FOR UNDER $100
For more DIY art ideas, go here and for more bedroom inspiration, click here.


A Moody Primary Bedroom Retreat // One Room Challenge Reveal - This is our Bliss
November 20, 2022 at 9:41 PM[…] WALLPAPER ACCENT WALLWEEK 5 // HOW TO CREATE A COZY READING NOOK IN YOUR BEDROOMWEEK 6 // HOW TO DIY A LARGE STATEMENT ART PIECE FOR UNDER $100WEEK 7 // PRIMARY BEDROOM UPDATE // ORC WEEK 7 […]
Primary Bedroom Design // Fall 2022 One Room Challenge - This is our Bliss
November 10, 2022 at 12:53 PM[…] How to DIY a Large Statement Art Piece for Over Your Bed […]
Primary Bedroom Progress // ORC Week 7 Update - This is our Bliss
November 10, 2022 at 11:11 AM[…] MOODY WALLPAPER ACCENT WALLWEEK 5 // HOW TO CREATE A COZY READING NOOK IN YOUR BEDROOMWEEK 6 // HOW TO DIY A LARGE STATEMENT ART PIECE FOR UNDER $100WEEK 7 // PRIMARY BEDROOM UPDATE // ORC WEEK 7 […]
Cheryl
November 4, 2022 at 3:41 PMLove this idea. Turned out great!
How to Create a Cozy Reading Nook in Your Bedroom - This is our Bliss
November 4, 2022 at 10:35 AM[…] WEEK 1 // PRIMARY BEDROOM DESIGN BOARDWEEK 2 // BEFORE PHOTOS OF THE PRIMARY BEDROOMWEEK 4 // OUR MOODY WALLPAPER ACCENT WALLWEEK 5 // HOW TO CREATE A COZY READING NOOK IN YOUR BEDROOMWEEK 6 // HOW TO DIY A LARGE STATEMENT ART PIECE FOR UNDER $100 […]